

Schiller confirms white iPhone Spring release
 If you are one of those people still holding out for a white iPhone 4 then things are looking up, with Apple's Phil Schiller confirming that the pale handset will be arriving soon.
Schiller, responding to a teenager's question on Twitter, confirmed the news, although obviously there is no mention of a white iPhone 4 UK release date.
"The white iPhone will be available this spring (and it is a beauty!)." tweeted Schiller.
White spring
The desire to own a white version of the iPhone has been huge, with thousands left wanting after Apple decided not to put a white iPhone 4 into production until this year due to production difficulties.
A Spring 2011 date has already been leaked in Apple documentation, and rumours of first a March and then April release date have been circulated.
Of course, with the iPhone 5 likely to be announced in summer and the iPad 2 available in white, you may wonder if it's worth holding off to see if the next incarnation is not, in the words of Henry Ford, "available in any colour, as long as it's black."
 |  |
Read More ...
iPhone 5 will not have NFC, says source
 The Apple iPhone 5 will apparently not have near field communications (NFC), according to reports in The Independent.
 Quoting sources from 'several of the largest mobile operators in the UK' the Indy suggests that Apple has told them not to expect NFC.
NFC is a similar technology to that found in Oyster Cards allowing people to wave their phone at readers and make a connection – allowing you to pay for goods for instance, or register at an event.
It was widely expected that the Apple iPhone 5 would bring the NFC technology, following in the footsteps of rival Google who brought it in for its last handset the Google Nexus S.
"The new iPhone will not have NFC, Apple told the operators it was concerned by the lack of a clear standard across the industry," said The Independent's source.
The launch and arrival of the Apple iPhone 5 are key dates in the technology calendar for this year, with the next generation phone almost certain to be a big seller, given the performance of its predecessors.
| |
Read More ...
10 best alternative operating systems
 Right now, someone, somewhere is developing the killer operating system feature of the future - a feature that will change computing and make us wonder how we lived without it.
 However, the person responsible probably isn't grafting away in the labs of Microsoft, Apple or Red Hat - he or she is more likely to be working in a bedroom or loft.
Big companies can grow reticent to change, slow to move and adopt new technologies. Features must be escalated through approval bodies, management and bean-counters. Hobbyist projects don't have those commercial pressures and can experiment freely.
It might seem audacious to claim that the next Windows is cooking in some part-time coder's house, but it's nothing new. Microsoft's OS empire started with the purchase of QDOS, which stood for 'Quick and Dirty Operating System'. Apple didn't create Mac OS X out of thin air, but took an open source kernel and some BSD code (grounded in academia) to get the foundations of its operating system working.
The most successful projects often begin life in ways we'd never expect, and it can take a while for their potential to be fully realised.
Into the future
We'll look at the best alternative operating systems, with the potential to change the computing landscape over the next decade. There's only one rule - no Microsoft, Apple or Linux.
While some of these new operating systems are still relatively early in development, the technology that they're introducing could make its way into the next round of updates for the mainstream OSes we use. Helpfully, you can try these projects without having to repartition your hard drive thanks to the excellent (and free) PC virtualisation and emulation tool available from www.virtualbox.org.
These OSes are all supplied as disk images - usually CD ISOs - so you can install VirtualBox, grab the ISO and tell VirtualBox to boot from it to try it out. You can burn the ISO files to CD-Rs and boot them on your real PC if you want to see how they handle the bare metal, but remember that mid-development releases could contain bugs.
10. GNU/HURD
Fighting for microkernels
www.gnu.org/software/hurd
The GNU project started in 1984 to create a completely free software Unix OS. By the early '90s it had many tools finished, but still no kernel. Linux arrived and was paired with GNU to form what we now call Linux (also known as GNU/Linux).
However, the GNU project has been developing a kernel called HURD. This is based on the Mach microkernel, as used in Mac OS X, and consists of servers running in their own address spaces.

There are services for hardware drivers, filesystems, authentication and more. These are more isolated than in a typical OS, so HURD should - in theory - be more reliable. It will also be easier to update and replace OS components without reboots.
9. JNode
Desktop Java to the extreme
www.jnode.org
Java's heyday on the desktop is long gone, with web-based games and apps mostly delivered by Flash and HTML5. But there's one project that aims to prove that Java can still hack it when it comes to desktop computing - JNode.
Apart from a very small assembly language core, the vast majority of the JNode operating system is written in Java. JNode's goal is to run any Java application, although it's currently only at version 0.2.8.

The interface is simple, there's some decent documentation online, and progress is being made towards 0.3. Planned future features include lower memory consumption, wireless networking and more hardware acceleration for video.
8. FreeVMS
Industrial strength OS
www.freevms.net
Back in the '70s and '80s, the main competitor to Unix on big-iron hardware was VMS. Famed for its stability, running on chunky fridge-like boxes called VAXes, it included advanced clustering and security features for its time, along with an automatic versioning file system.
Dave Cutler, one of the designers of the VMS operating system, went on to lead development of Windows NT, but OpenVMS stuck around and now runs on Itanium systems.

FreeVMS is striving to build on VMS's feature set, although unlike many clone projects where developers can get easy access to the original OS, VMS gurus are hard to find. FreeVMS is currently only at version 0.4, but is still making solid progress.
7. DexOS
BeOS clone hobby project
www.dex4u.com
For a desktop operating system, we expect the usual assortment of window furniture, panels and launchers. DexOS is a small project that provides a more console-like approach.
This works in two ways: the graphical front-end is more like a video game launcher than a traditional OS, and programmers can easily access the bare metal for maximum performance. It's an intriguing concept, and the take up of Android and iOS in the last couple of years has shown that traditional desktop computing metaphors are starting to look long in the tooth.

DexOS demonstrates what a bunch of part time hobbyist coders can achieve, without lots of funding or commercial backing.
6. Inferno
Sharing, everywhere
www.vitanuova.com/inferno/
Inferno has been doing the rounds for almost a decade, and in some respects it's still way ahead of other OSes. Inferno is built to be a distributed OS - it's designed to share resources across machines.
Using a protocol called Styx, systems running Inferno can share hardware and networking devices with one another seamlessly. For instance, an application on Inferno box A is able to access the hard drive of Inferno box B without knowing it's actually on a remote machine.

Inferno applications are written in a language called Limbo, which is compiled down to code for a virtual machine called Dis, so they're portable across the various architectures Inferno supports.
5. KolibriOS
The fastest GUI OS in existence?
www.kolibrios.org
Operating systems used to be written in assembly language, but you'd be hard pressed to find much in the source tree of a modern OS. It's true that programming in assembly is hard work, but it can often lead to results that a typical compiler can't compete with.

KolibriOS, a fork of MenuetOS, is written entirely in assembly, and it shows - it's tiny (4.9MB for the ISO) and ridiculously fast (booting in a couple of seconds). Despite this, it includes a web browser, mail client, games, desktop utilities, impressive demos and more, all running at light speed.
They're nowhere near as feature-packed as their Windows counterparts, but they underline how much bloat and wastefulness we're now used to.
4. OpenBSD
Security before style
www.openbsd.org
Security is OpenBSD's mantra. Unlike other operating systems, which consider security a feature like performance or prettiness, the OpenBSD team won't add any code unless it's sure that it's completely free of security holes.
It audits parts of the codebase for vulnerabilities, and have made modifications to the standard C libraries to prevent buffer overruns and other problems.

OpenBSD was the first non-research OS to integrate many features we now take for granted, including address space layout randomisation, which puts libraries and memory sections in random locations in RAM, so crackers can't assume their location.
3. AROS
Something for Amiga lovers
http://aros.sourceforge.net
You may have fond memories of the Amiga. The dazzling graphics and crisp sound (when PCs were faffing around with text mode and beeps), the super-fast multi-tasking, and the, er, lack of protected memory…
Well, forget that last one. It was one of the best-loved computers of all time, and it still has many fans today.

AROS - the Amiga Research Operating System - is intensely fast. Blisteringly so. It apes the Amiga design, both superficially and with its inner workings, and is designed to be source compatible with AmigaOS 3.1 (software written for the old Amiga OS should only need a recompile to work).
AROS has great potential as a light and fast OS for low-end netbooks and tablets.
2. ReactOS
Open source Windows clone that could save businesses a fortune
www.reactos.org
If you've dabbled in Linux, you may have heard of WINE, a compatibility layer that lets certain Windows programs run on Linux. Effectively, it intercepts calls to the Windows API, replacing them with Linux equivalents. It includes its own batch of DLLs, but it can use native Windows DLLs too for improved software compatibility.
WINE's compatibility ranges from superb to terrible, with the focus on triple-A applications such as Microsoft Office and Photoshop. Generally, older applications work better, and anything that doesn't poke around in the undocumented internals of Windows has a chance of running.
However, WINE mixes up the Windows and Unix approaches to operating systems, with the end result being a pretty ugly mess. It also can't use Windows drivers.

ReactOS aims to fix all this. Instead of being a layer on top of another OS, ReactOS is a completely standalone project, bootable from an install or live CD. It does use WINE DLLs, but it has its own bootloader, kernel and other low-level facilities that should - in theory - make it compatible with Windows drivers.
ReactOS aims to be an open source, drop-in replacement for Windows. This gives it potential to radically shake up the market. ReactOS, a Windows clone, could one day be the next Windows - at least, for a good chunk of people. That sounds outrageous, but the vast majority of Windows boxes run a very small range of programs: IE or Firefox, MS Office and a couple of games, with a bit of Photoshop or Dreamweaver.
ReactOS doesn't have to run 50,000 Windows applications adequately; it just needs to run the top 10 well. Imagine you're a netbook manufacturer in a crowded market, and you want to get your prices down as low as possible. Instead of paying licenses to Microsoft for Windows, you could install ReactOS on your machines for free, put a list of ticks on the box saying 'Runs Microsoft Office, Internet Explorer, Photoshop and World of Warcraft' and save a lot of money.
Or imagine that you're a business with 5,000 Windows PCs that need upgrading because XP is end of life. Instead of buying 5,000 Windows 7 licenses, you could drop ReactOS any PCs that just run Office and Outlook.
These scenarios are still a while off: ReactOS is only at version 0.3.12, having been developed since the late '90s, and there's still a lot of work to be done. But compatibility is improving and you can see the status of your favourite programs at www.reactos.org/compat.
1. Haiku
The lightning-fast BeOS lives on in the speedy, simple Haiku
www.haiku-os.org
And so we come to the number one project - the OS most likely to be the next big desktop hit. Why have we chosen Haiku for this slot?
Firstly, it intends to simply recreate an existing operating system, BeOS, but as open source. There's no room for changes of direction, random new features or endless arguments on mailing lists about trivial design decisions.
Secondly, the developers are passionate about their work - they love BeOS. Thirdly, a great deal of attention has been paid to presentation, documentation and the other bits developers often ignore because they'd rather be hacking code.
If you were active in the PC world in the late 1990s, you may remember BeOS. Designed for the PowerPC, it was ported to the x86 PC architecture, offering a unique experience that was designed from the ground-up for desktop computing.
BeOS demos typically showed several spinning OpenGL teapots running flawlessly on screen as multiple MP3s played in the background. In the days of Windows 9x and Mac OS 8/9, BeOS's stellar performance, simplicity and lack of historical baggage won it an army of hardcore fans.
Its file system supported attributes for storing metadata, with features making it rather like a database.
However, from a commercial perspective, BeOS suffered greatly. Be Inc, the OS's makers, found it very hard to break into the Windows-dominated PC market. Ultimately, Be Inc sued Microsoft for allegedly preventing PC makers from selling BeOS machines; Microsoft never admitted guilt, but settled out of court for $23 million. However, by this point it was too late for BeOS to gain a serious foothold in the market.

Haiku, formerly known as OpenBeOS, began life in 2001 and is now capable of running many older BeOS programs (along with newer ports like Firefox). It retains the clean, modern architecture and desktop design of BeOS, but with added support for more recent hardware devices.
The developers are huge BeOS fans - they stuck by the OS in hard times and still champion its strengths today. They've also put a lot of effort into making the website look smart and ensuring the documentation is thorough.
Haiku offers a chance to bring speed, simplicity and enjoyment back to computing. It's a system designed purely as a modern, graphical desktop operating system without carrying sacks of historical baggage.
| |
| |
Read More ...
10 best alternative operating systems
Right now, someone, somewhere is developing the killer operating system feature of the future - a feature that will change computing and make us wonder how we lived without it. However, the person responsible probably isn't grafting away in the labs of Microsoft, Apple or Red Hat - he or she is more likely to be working in a bedroom or loft.
Big companies can grow reticent to change, slow to move and adopt new technologies. Features must be escalated through approval bodies, management and bean-counters. Hobbyist projects don't have those commercial pressures and can experiment freely.
It might seem audacious to claim that the next Windows is cooking in some part-time coder's house, but it's nothing new. Microsoft's OS empire started with the purchase of QDOS, which stood for 'Quick and Dirty Operating System'. Apple didn't create Mac OS X out of thin air, but took an open source kernel and some BSD code (grounded in academia) to get the foundations of its operating system working.
The most successful projects often begin life in ways we'd never expect, and it can take a while for their potential to be fully realised.
Into the future
We'll look at the best alternative operating systems, with the potential to change the computing landscape over the next decade. There's only one rule - no Microsoft, Apple or Linux.
While some of these new operating systems are still relatively early in development, the technology that they're introducing could make its way into the next round of updates for the mainstream OSes we use. Helpfully, you can try these projects without having to repartition your hard drive thanks to the excellent (and free) PC virtualisation and emulation tool available from www.virtualbox.org.
These OSes are all supplied as disk images - usually CD ISOs - so you can install VirtualBox, grab the ISO and tell VirtualBox to boot from it to try it out. You can burn the ISO files to CD-Rs and boot them on your real PC if you want to see how they handle the bare metal, but remember that mid-development releases could contain bugs.
10. GNU/HURD
Fighting for microkernels
www.gnu.org/software/hurd
The GNU project started in 1984 to create a completely free software Unix OS. By the early '90s it had many tools finished, but still no kernel. Linux arrived and was paired with GNU to form what we now call Linux (also known as GNU/Linux).
However, the GNU project has been developing a kernel called HURD. This is based on the Mach microkernel, as used in Mac OS X, and consists of servers running in their own address spaces.
There are services for hardware drivers, filesystems, authentication and more. These are more isolated than in a typical OS, so HURD should - in theory - be more reliable. It will also be easier to update and replace OS components without reboots.
9. JNode
Desktop Java to the extreme
www.jnode.org
Java's heyday on the desktop is long gone, with web-based games and apps mostly delivered by Flash and HTML5. But there's one project that aims to prove that Java can still hack it when it comes to desktop computing - JNode.
Apart from a very small assembly language core, the vast majority of the JNode operating system is written in Java. JNode's goal is to run any Java application, although it's currently only at version 0.2.8.
The interface is simple, there's some decent documentation online, and progress is being made towards 0.3. Planned future features include lower memory consumption, wireless networking and more hardware acceleration for video.
8. FreeVMS
Industrial strength OS
www.freevms.net
Back in the '70s and '80s, the main competitor to Unix on big-iron hardware was VMS. Famed for its stability, running on chunky fridge-like boxes called VAXes, it included advanced clustering and security features for its time, along with an automatic versioning file system.
Dave Cutler, one of the designers of the VMS operating system, went on to lead development of Windows NT, but OpenVMS stuck around and now runs on Itanium systems.
FreeVMS is striving to build on VMS's feature set, although unlike many clone projects where developers can get easy access to the original OS, VMS gurus are hard to find. FreeVMS is currently only at version 0.4, but is still making solid progress.
7. DexOS
BeOS clone hobby project
www.dex4u.com
For a desktop operating system, we expect the usual assortment of window furniture, panels and launchers. DexOS is a small project that provides a more console-like approach.
This works in two ways: the graphical front-end is more like a video game launcher than a traditional OS, and programmers can easily access the bare metal for maximum performance. It's an intriguing concept, and the take up of Android and iOS in the last couple of years has shown that traditional desktop computing metaphors are starting to look long in the tooth.
DexOS demonstrates what a bunch of part time hobbyist coders can achieve, without lots of funding or commercial backing.
6. Inferno
Sharing, everywhere
www.vitanuova.com/inferno/
Inferno has been doing the rounds for almost a decade, and in some respects it's still way ahead of other OSes. Inferno is built to be a distributed OS - it's designed to share resources across machines.
Using a protocol called Styx, systems running Inferno can share hardware and networking devices with one another seamlessly. For instance, an application on Inferno box A is able to access the hard drive of Inferno box B without knowing it's actually on a remote machine.
Inferno applications are written in a language called Limbo, which is compiled down to code for a virtual machine called Dis, so they're portable across the various architectures Inferno supports.
5. KolibriOS
The fastest GUI OS in existence?
www.kolibrios.org
Operating systems used to be written in assembly language, but you'd be hard pressed to find much in the source tree of a modern OS. It's true that programming in assembly is hard work, but it can often lead to results that a typical compiler can't compete with.
KolibriOS, a fork of MenuetOS, is written entirely in assembly, and it shows - it's tiny (4.9MB for the ISO) and ridiculously fast (booting in a couple of seconds). Despite this, it includes a web browser, mail client, games, desktop utilities, impressive demos and more, all running at light speed.
They're nowhere near as feature-packed as their Windows counterparts, but they underline how much bloat and wastefulness we're now used to.
4. OpenBSD
Security before style
www.openbsd.org
Security is OpenBSD's mantra. Unlike other operating systems, which consider security a feature like performance or prettiness, the OpenBSD team won't add any code unless it's sure that it's completely free of security holes.
It audits parts of the codebase for vulnerabilities, and have made modifications to the standard C libraries to prevent buffer overruns and other problems.
OpenBSD was the first non-research OS to integrate many features we now take for granted, including address space layout randomisation, which puts libraries and memory sections in random locations in RAM, so crackers can't assume their location.
3. AROS
Something for Amiga lovers
http://aros.sourceforge.net
You may have fond memories of the Amiga. The dazzling graphics and crisp sound (when PCs were faffing around with text mode and beeps), the super-fast multi-tasking, and the, er, lack of protected memory…
Well, forget that last one. It was one of the best-loved computers of all time, and it still has many fans today.
AROS - the Amiga Research Operating System - is intensely fast. Blisteringly so. It apes the Amiga design, both superficially and with its inner workings, and is designed to be source compatible with AmigaOS 3.1 (software written for the old Amiga OS should only need a recompile to work).
AROS has great potential as a light and fast OS for low-end netbooks and tablets.
2. ReactOS
Open source Windows clone that could save businesses a fortune
www.reactos.org
If you've dabbled in Linux, you may have heard of WINE, a compatibility layer that lets certain Windows programs run on Linux. Effectively, it intercepts calls to the Windows API, replacing them with Linux equivalents. It includes its own batch of DLLs, but it can use native Windows DLLs too for improved software compatibility.
WINE's compatibility ranges from superb to terrible, with the focus on triple-A applications such as Microsoft Office and Photoshop. Generally, older applications work better, and anything that doesn't poke around in the undocumented internals of Windows has a chance of running.
However, WINE mixes up the Windows and Unix approaches to operating systems, with the end result being a pretty ugly mess. It also can't use Windows drivers.
ReactOS aims to fix all this. Instead of being a layer on top of another OS, ReactOS is a completely standalone project, bootable from an install or live CD. It does use WINE DLLs, but it has its own bootloader, kernel and other low-level facilities that should - in theory - make it compatible with Windows drivers.
ReactOS aims to be an open source, drop-in replacement for Windows. This gives it potential to radically shake up the market. ReactOS, a Windows clone, could one day be the next Windows - at least, for a good chunk of people. That sounds outrageous, but the vast majority of Windows boxes run a very small range of programs: IE or Firefox, MS Office and a couple of games, with a bit of Photoshop or Dreamweaver.
ReactOS doesn't have to run 50,000 Windows applications adequately; it just needs to run the top 10 well. Imagine you're a netbook manufacturer in a crowded market, and you want to get your prices down as low as possible. Instead of paying licenses to Microsoft for Windows, you could install ReactOS on your machines for free, put a list of ticks on the box saying 'Runs Microsoft Office, Internet Explorer, Photoshop and World of Warcraft' and save a lot of money.
Or imagine that you're a business with 5,000 Windows PCs that need upgrading because XP is end of life. Instead of buying 5,000 Windows 7 licenses, you could drop ReactOS any PCs that just run Office and Outlook.
These scenarios are still a while off: ReactOS is only at version 0.3.12, having been developed since the late '90s, and there's still a lot of work to be done. But compatibility is improving and you can see the status of your favourite programs at www.reactos.org/compat.
1. Haiku
The lightning-fast BeOS lives on in the speedy, simple Haiku
www.haiku-os.org
And so we come to the number one project - the OS most likely to be the next big desktop hit. Why have we chosen Haiku for this slot?
Firstly, it intends to simply recreate an existing operating system, BeOS, but as open source. There's no room for changes of direction, random new features or endless arguments on mailing lists about trivial design decisions.
Secondly, the developers are passionate about their work - they love BeOS. Thirdly, a great deal of attention has been paid to presentation, documentation and the other bits developers often ignore because they'd rather be hacking code.
If you were active in the PC world in the late 1990s, you may remember BeOS. Designed for the PowerPC, it was ported to the x86 PC architecture, offering a unique experience that was designed from the ground-up for desktop computing.
BeOS demos typically showed several spinning OpenGL teapots running flawlessly on screen as multiple MP3s played in the background. In the days of Windows 9x and Mac OS 8/9, BeOS's stellar performance, simplicity and lack of historical baggage won it an army of hardcore fans.
Its file system supported attributes for storing metadata, with features making it rather like a database.
However, from a commercial perspective, BeOS suffered greatly. Be Inc, the OS's makers, found it very hard to break into the Windows-dominated PC market. Ultimately, Be Inc sued Microsoft for allegedly preventing PC makers from selling BeOS machines; Microsoft never admitted guilt, but settled out of court for $23 million. However, by this point it was too late for BeOS to gain a serious foothold in the market.
Haiku, formerly known as OpenBeOS, began life in 2001 and is now capable of running many older BeOS programs (along with newer ports like Firefox). It retains the clean, modern architecture and desktop design of BeOS, but with added support for more recent hardware devices.
The developers are huge BeOS fans - they stuck by the OS in hard times and still champion its strengths today. They've also put a lot of effort into making the website look smart and ensuring the documentation is thorough.
Haiku offers a chance to bring speed, simplicity and enjoyment back to computing. It's a system designed purely as a modern, graphical desktop operating system without carrying sacks of historical baggage.
| |
Read More ...
Tutorial: How to speed up your Windows PC
 The First Law of Computing states that, no matter how much money you spend on a PC, it's never quite fast enough. As a result, we're always looking for new ways to squeeze a bit more performance out of our systems.
 While there are plenty of speed-up guides available online, most deliver only minor variations on advice you already know: uninstall unwanted programs, disable any irrelevant services, clean up temporary files, defrag your hard drive and so on.
These are all good, solid tips, but if you're an experienced user, there comes a time when you want to move beyond the basics - to crank up the volume and hear something new.
Achieving this is easier than you might think, because your PC's OS includes a host of amazing ideas and technologies that rarely get much attention. Why? Sometimes they're too technical for the average home user.
Interrupt Affinity, for instance, allocates a specific processor to handle demands from a particular device, like your network card. Microsoft says this can improve a PC's performance, but it may take some work to find the best settings.
If you'd like to try it, check out Microsoft's guide (there's a discussion on real-life experiences available here).
Calculated risk
Exposing other technologies to public view may be seen as too risky. Windows 7 includes a new feature called the Fault Tolerant Heap, for example, which detects crashes caused by memory-handling issues and tries to fix them when the application is run again.
It has Registry settings that you can tweak to improve stability or reduce resource use, but if you get this wrong you could end up making your PC worse, so it's not something Microsoft boasts about.
If you're keen to take a look anyway, Technet has the details.
Other ideas tend to get forgotten. Install some programs, for instance, and they may add variables such as pointers to files or folders. When you uninstall your apps, some of these may be left behind. While this isn't a big issue, it may waste a little RAM or slow down the odd disc access, so there's no harm in looking. The Rapid Environment Editor will highlight errors for you.
In this article we'll reveal a little-known hard drive optimisation that could increase performance of some PCs by up to 50 per cent. We'll explain how you can persuade Windows 7's power plan settings dialog to reveal a host of CPU-related settings and tweaks.
We'll talk about network performance improvements introduced in Windows Vista and 7 that are turned off by default and will remain that way unless you know how to enable them. We'll discuss ways to remove unwanted drivers, disable an obscure, resource-hogging NTFS feature and squeeze the maximum power from your processor.
Remember, these aren't your average tuning techniques. Some will deliver real results, but several come with risks attached. It's therefore vital that you protect your data by activating System Restore and backing up your important files before changing anything.
Drivers
Just about every PC optimisation guide will recommend you uninstall unwanted programs to save resources. Some will also suggest disabling any unnecessary Windows services. This is sensible advice, but if you stop there you'll be ignoring a huge amount of clutter.
Drivers are installed by devices and many applications, but they're often left behind if you unplug the hardware or uninstall the program. Applications often install their own Windows services too, without you even realising.
Most optimisation guides won't cover these because they're not standard Windows services, but if you're looking to get the most from your PC then it may be worth removing some of them. Culling these will only deliver minimal benefits.
Removing failed (or multiple) driver installations can make your PC more stable though, and there's little more annoying than when you need to remove or replace a driver, but Windows keeps reinstalling it. Knowing how to kill a driver for good can be very useful.
Device Manager
The simplest way to begin culling unwanted drivers is with Device Manager. Of course 'simple' isn't always best, at least in this case: removing the wrong drivers can cause problems that might prevent your PC booting, even in safe mode. Don't try this unless you have a backup, and enough bootable recovery tools to cope if something goes wrong.

For another view on your drivers, open a command window (right-click the 'cmd.exe' window and select 'Run as administrator' in Windows Vista or 7), and enter the command pnputil -e. This will display all your third-party drivers - everything you and your installed apps have added to Windows.
For the most part, these won't be doing any harm beyond occupying a little hard drive space and maybe a few Registry references. If you find a driver that you know isn't system-critical and you want to delete it (so you can reinstall it more easily, perhaps), make a note of its 'Published name' and enter the command pnputil -d oem12.inf, where 'oem12.inf' is replaced by the file name on your system.
If Windows tells you the device is in use, you can force deletion with the -f switch like this: pnputil -f -d oem12.inf. You need to be sure that Windows can cope without it.
Third-party services are easier to review. Just launch 'MSCONFIG.EXE', click 'Services', check 'Hide all Microsoft services' and look for items you don't need. Apple Mobile Device and Bonjour Service, installed with iTunes, are good examples. If you don't have an iPod, iPhone or other Apple device and don't use Bonjour (a network discovery tool), they're unnecessary.
If you spot something like this that's running and you're sure you don't need it, launch the Services applet ('services.msc'), then find and double-click it for more information. If you're positive that the service is unnecessary, set its 'Startup type' to 'Disabled' to turn it off when you next reboot.
Clean up your system with Device Manager
If you suspect that your PC is suffering driver problems, launch the Device Manager tool from Control Panel (or run 'devmgmt.msc' directly). If a device has a problem, its section will be expanded and it'll be highlighted with a yellow exclamation mark.
Double-click the faulty driver, click the 'Driver' tab and use the 'Update driver', 'Disable' or 'Uninstall' button to solve the problem. Device Manager won't show you all the drivers installed on your PC by default, but a quick tweak will change that and you'll soon be removing any unwanted junk.
1. Setup

Right-click 'Computer', select 'Properties' and click 'Advanced (system settings) | Environment variables | New'. Enter DEVMGR_SHOW_NONPRESENT_DEVICES for your variable name, 1 for the value and click 'New | OK'.
2. Hunt for junk

Launch Device Manager, click 'View | Show hidden devices' and you'll see a 'Non-plug and play drivers' section. Expand this to see leftovers from past installations (we found 13 McAfee drivers on a PC with no McAfee software).
3. Clean up

If you see a device that relates to something you've uninstalled (and nothing else), its icon is greyed out and your system is backed up in case of problems, then you can remove it. Right-click the entry and select 'Uninstall | OK'.
How to speed up your internet connection
Does your internet connection tend to be rather slow and unreliable? If so, Windows has a great selection of handy tweaks and technologies that might be able to help - if you can find them and put them to use safely.
Network connections normally start transfers by sending small blocks of data, for instance, increasing these in size only gradually. Compound TCP (CTCP) ramps up your window size more aggressively, often improving performance.
It's turned off in Windows Vista and 7 by default, but you can restore it by launching an elevated command prompt and entering netsh int tcp set global congestionprovider=ctcp.
If you encounter problems, re-enter the command with =none to turn it off, or =default for the default value.
Windows 7 also introduced Direct Cache Access (DCA), which reduces system overheads by allowing a network controller to transfer data directly into a CPU cache (if your system supports it). This is turned off by default, but can be activated with a netsh command: netsh int tcp set global dca=enabled. Use =disabled to turn it off if it doesn't help.
You can use the same tool to activate Explicit Congestion Notification (ECN) - a technology that helps your system cope with network congestion without dropping packets. Remember, if you're downloading big files and not suffering from congestion, this can slow your system down.
Check your PC to see ECN's status. If it's off and your system supports it, entering netsh int tcp set global ecncapability=enabled will turn ECN on (=disabled will turn the technology off, and =default sets the default setting). Test your connection to look for improvement.

All these features can give your CPU more work to do, but in many cases this can be minimised by allowing your network card's processor to handle the connection. This should be activated automatically, but it's not clear that this always happens. Even Microsoft recommends enabling the feature manually (if your network card supports it) so it's worth a try.
Enter netsh int tcp set global chimney=enabled to turn the feature on, or use =disabled to turn it off.
Registry tweaks to speed up your network
There are plenty of brilliant network-related Registry settings available. Launch REGEDIT, browse to 'HKLM\System\CurrentControlSet\Services\LanmanWorkstation\Parameters', then consider some of these possibilities.
Windows throttles traffic on networks with high latencies (delays), reducing timeouts but slowing you down. To disable this, add a DWORD value called 'Disable Bandwidth Throttling' to '\Lanman Workstation\Parameters' and set it to '1'.
The system is equally cautious with TCP auto-tuning, disabling it if there's any chance your system won't support it. Add a DWORD value called EnableWsd and set it to '0' to disable these diagnostics and keep auto-tuning on regardless.
Your home PCs cache data about files and folders they access. Increasing the cache size uses more RAM, but can reduce network traffic and improve speeds.
Add FileInfoCacheEntriesMax, DirectoryCacheEntriesMax and FileNotFoundCacheEntriesMax DWORD values to '\LanmanWorkstation\Parameters', set them to values greater than their defaults (64, 16 and 128), reboot and see what happens.
Be careful and if you have any issues, return to the Registry key you've added, delete it, reboot and your PC will be back to normal.
How to speed up your CPU
Windows 7 adds support for several new CPU features that reduce energy use, which sounds great - except some say they compromise performance. Worse, all these settings are hidden by default, however that can be changed.
Enter the following two commands at the command prompt: powercfg -attributes SUB_PROCESSOR 0cc5b647-c1df-4637-891a-dec35c318583-ATTRIB_HIDE and powercfg -attributes SUB_PROCESSOR ea062031-0e34-4ff1-9b6deb1059334028-ATTRIB_HIDE.
Now go to 'Control Panel | Power options | Change plan settings (for your current plan) | Change advanced power settings | Processor power management'. You'll see two new options: 'Processor performance core parking min cores' and 'Processor performance core parking max cores'.
These settings related to Core Parking, a feature that allows your CPU to turn off some cores to save power when your system load is minimal. While generally a good thing, some say it causes problems, and recommend turning parking off. Set 'Min cores' and 'Max cores' to 100 and reboot your machine to make this happen.
Need more tweaks? There are plenty, including additional Core Parking options, performance management, idle states and more. Download Microsoft's guide to Processor Power Management and locate a setting of interest.

Copy its GUID from the document - 'Allow throttle states' is '3b04d4fd-1cc7-4f23-ab1c-d1337819c4bb', for instance - and build a command along the lines of powercfg -attributes SUB_ PROCESSOR 3b04d4fd-1cc7-4f23-ab1c-d1337819c4bb-ATTRIB_HIDE.
Enter this at the command line and the new setting will be visible. (Use +ATTRIB_HIDE at the end to hide it again.)
Keep in mind that there's a reason why many of these tweaks are hidden, though. If you disable PC idle states, for instance, you may gain a tiny amount in terms of performance, but your CPU could also run very hot, shortening its life.
Change your settings carefully, ideally monitoring details like temperature for any changes. CPU scheduling PCs are always busy, with far more processes active then there are CPU cores available. Windows manages this by running each thread for a brief period, called a quantum. When that time is up, the scheduler looks for other apps that need the CPU and runs one of those.
By default, this system triples the quantum for the foreground application, and generally does a good job of sharing processor time. But if you want to improve things, there are a couple of ways to do it.
One option is to use the Windows Server scheduling settings. These don't optimise the foreground application, so your user interface won't feel so snappy, but they provide a quantum six times longer than usual, minimising overheads and improving CPU efficiency.
To try this, right-click 'Computer,' click 'Advanced' (then 'Performance settings | Advanced' in Vista or later) and set 'Adjust for best performance of' to 'Background services'.
Or you can customise your quantum manually. Run 'REGEDIT', browse to 'HKEY_LOCAL_MACHINE\SYSTEM\CurrentControlSet\Control\ PriorityControl', set 'Win32 PrioritySeparation' to '16 (Hex)', and you'll get a long quantum that also optimises the foreground app - a good compromise.
Registry tweaks to speed up your PC
Windows is full of Registry tweaks that can optimise your PC for a variety of tasks. When the OS boots, for instance, it creates threads to carry out system tasks. Adding more can improve performance on a busy PC, or waste resources if there's not much to do.
To give this a try, go to 'HKLM\SYSTEM\CurrentControl Set\Control\SessionManager\Executive' in the Registry, create a DWORD value called 'Additional Critical WorkerThreads' and set it to something between 1 and 16 (decimal). Then add a DWORD value called 'AdditionalDelayed WorkerThreads' in the same location and use the same value. Reboot and test your system.

If you're running applications that perform many network operations at once, you can benefit from increasing the number of commands that you can cache. Go to 'HKLM\SYSTEM\CurrentControlSet\Services\Lanman Workstation\Parameters', create a DWORD value called 'MaxCmds' and try setting it to 64. Delete the value to restore the default setting.
Some versions of Windows run the driver verifier at random to check your drivers. This is good if it uncovers problems, but otherwise it slows you down.
To turn it off, go to 'HKLM\SYSTEM\CurrentControlSet\Control\FileSystem', add a DWORD value 'DontVerifyRandomDrivers' and set it to 1.
Windows Vista and 7 networks support Large MTU, which sees the maximum size of a data packet increased from 64kB to 1MB. If you have ultra-fast network kit, this may improve performance, but if not, it'll cause problems.
Want to try it? Go to 'HKLM\system\CurrentControlSet\Services\LanmanWorkstation\Parameters', set 'DisableLargeMTU' to 0 and reboot. Apply the same setting to your other network PCs and look for improvements. Set the value to 1 to restore the default setting.
Temporary files
Usually you'll enter the Registry to tweak a setting, but sometimes viewing existing settings can be useful. For the perfect example, go to 'HKEY_LOCAL_MACHINE\SYSTEM\ControlSet001\Control\BackupRestore\FilesNotToBackup'.
As you might guess from the final key name, this contains a list of system folders that backup tools should ignore, usually because they contain temporary files. This is a list of places that may contain large amounts of cached files, perfect for further exploration.
Of course. you shouldn't delete these straight away; many contain useful data - some of the time. Our test PC did include '%windir%\softwaredistribution\*.* /s' though - that's '\Windows\ SoftwareDistribution' and all its subfolders.
A visit to Google told us the folder is related to Windows Update, and can be emptied if you're careful (see method 10 at http://support.microsoft.com/kB/822798). This contained 5GB of files, so we wiped them and recovered the hard drive space.
Filesystem tweaks
You can improve your hard drive speeds by up to 50 per cent with this effective tweak.
One of the most effective conventional PC optimisation techniques you can try is simply to defrag your hard drive, rearranging its files for optimum performance. Something like Auslogics Disk Defrag will do the job for free, and it's so effective that you might think there's no need to do anything else.
But, as we've seen, Windows has many potential speed issues that are far from obvious, and hard drives have one of the most significant: partition alignment. In certain cases, if your system isn't set up correctly, then its drive performance can be cut by anything up to 50 per cent, so it's an issue you really need to consider.
The partition alignment problem is based around the way data is stored on your hard drive. You've probably seen diagrams of this before, showing how files are stored in units of a minimum size, called a cluster, and it's easy to imagine how this might work.
Let's say that your application needs a file, and this happens to be stored in cluster number 123,456. Windows asks your hard drive for that cluster number, the drive loads the information and sends it back. It sounds easy, but unfortunately it's not quite this simple in practice.
In reality, hard drives have a physical layer of sectors. These are overlaid by a logical layer of clusters, created when your hard drive is formatted. There may be other layers, too, but these are enough to describe the problem.

Unfortunately, the logical layer has historically assumed that drives use a 512-byte sector size, and started your partition after 63 sectors. Modern hard drives often use a 4kB sector size, and logical partitions following the 63 sector rule therefore don't align with the physical sector of the drive.
What does all this mean for your PC? If your application really needs a file in logical cluster number 123,456, then your hard drive might have to read physical sectors 123,455 and 123,456 to return the necessary data. This doesn't mean every read and operation will take twice as long as it should; drive geometry, caching and other factors reduce the overhead considerably. Still, it's potentially a serious problem. So does it apply to you?
Partition alignment
The good news is that most people's PCs are unlikely to be affected by partition alignment issues. If your hard drive was formatted by Windows Vista or 7, for instance, then it should be fine (Microsoft fixed its partitioning after the release of Windows XP). If you only have one hard drive then Microsoft says you're also less likely to be suffering any speed issues.
However, if your system has multiple drives organised in a RAID setup, or even just a single SSD, and they were partitioned by Windows XP (or anything else that doesn't understand alignment) then performance may be compromised. And there are drives, like Western Digital's Caviar Green series, that use an internal 4kB sector, yet for legacy reasons report a 512kB sector to Windows. These could slow down if they're misaligned, even on single drive systems.
There's no need to panic here, then. Your system is probably fine, but it's wise to check anyway. To make this easier, Paragon Software has developed an Alignment Tool that scans your PC for mismatched partitions, and if it finds any, gives you the option to move and realign them.
Keep in mind that realignment is a slow process, though. We deliberately set it a 'worst case' test, realigning a 1TB USB drive, and it took more than 12 hours. This may be an issue, especially because it can't be cancelled, and if there are any problems or interruptions then you could lose everything on the drive.
It's therefore vital to back up your complete system before you start, and you must give the program a great deal of time to work. Letting it run overnight would be a good idea. But with your safeguards in place, you can then give the program a try.
The results you'll get from this process vary depending on your particular drive and hardware: some people report little or no benefit, while others see major improvements. Even if the performance gains are minimal, though, cutting the number of read and write operations will help to extend your drive's life, and that alone makes it worth the effort.
NTFS tunnelling
Hard drives are subject to many other odd issues beyond partition alignment, but few are quite as strange as NTFS tunnelling.
When you delete a file, the tunnelling system caches its creation date, short and long name for a few seconds. It does this so that programs that modify documents by creating a temporary file, deleting the original, and renaming the temporary to the original name, will appear to have the original file when the process is complete (the short name and creation date will be the same).
This process requires RAM and a little CPU time, though, and can slow you down when you need to delete large numbers of files. This is because Windows has no way to know you won't be recreating them, so always caches their details. It may also be entirely unnecessary. Short file names are only important for 16-bit apps, for instance. And your application may handle the file creation date issue itself, or you may not care about it at all.
If you'd like to try disabling tunnelling, then, run REGEDIT and browse to HKEY_LOCAL_ MACHINE\SYSTEM\CurrentControlSet\Control\FileSystem. Create a new DWORD value called MaximumTunnelEntryAgeInSeconds, set it to zero, reboot your machine and see what happens.
Keep in mind that, like many of these tweaks, turning off tunneling can have odd and unexpected effects. Test your system carefully to confirm that everything is working as it should. If you experience any problems, simply delete the MaximumTunnel EntryAgeInSeconds value and reboot to restore your PC to normal.
Solve printer problems
Printers don't cause many problems, but you may experience crashes that relate to the printer spooler service ('spoolsv.exe'). If your PC starts experiencing printer-related crashes, this can often be tracked down to a program that's changed a core printer-related component. It sounds like it should be simple to solve, but this level of printer management has no user interface, and most people don't even know that it exists, so it's not exactly easy to fix.
Unless, that is, you know where to look in the Registry, where you can quickly and easily restore the problematic components to their defaults. As ever, make sure you back up your system and Registry first, then try this.
1. Printer driver

Launch 'services.msc', right-click 'Print spooler' and select 'Stop'. Launch 'REGEDIT' and browse to 'HKLM\SYSTEM\CurrentControlSet\Control\Print\Monitors\Local Port'. Double-click 'Driver' and ensure it's set to 'localspl.dll'.'
2. Port monitor

Go to 'HKLM\SYSTEM\CurrentControlSet\Control\Print\Monitors'. Defaults here include 'Microsoft shared', 'Standard TCP/IP', 'Local port' and 'USB monitor'. Remove others you've installed - you must have System Restore activated.
3. Print provider

Go to 'HKEY_LOCAL_MACHINE\SYSTEM\CurrentControlSet\Control\Print\Providers' and rename any print provider other than 'Internet print' or 'LanMan print' to have a '.old' extension. Restart your Print Spooler and try again.
| |
| |
Read More ...
Review: Dropbox 1.0
 Dropbox is one of those new web services that seems to have been around forever but that clings on to its 'beta' status. Only recently has Dropbox come out of beta and furnished us with a final first stab at a finished product.
 Dropbox 1.0 is an online storage service and by that definition there's nothing special about it at all. In fact, it seems strange that the service has become so popular given that iDisk exists, not to mention the other similar tools out there.
However, Dropbox has become a vital tool for some despite its beta status. The basic version gives you 2GB of online storage and you can pay to upgrade this should you need to.
Currently there are 50GB and 100GB options available at $9.99 (آ£6) a month and $20 (آ£13) a month.
Download the Dropbox tool and you get a new folder on your hard disk and an icon in the toolbar. It's not ground-shaking revolutionary stuff, that's for sure. However, the fact it acts almost invisibly is part of the application's power.
Once you've got a Dropbox account you simply start to use the storage area as you would any folder on your Mac. The stuff you copy to it is synced with the remote servers and that's it.
Now put a copy of Dropbox on your laptop or PC and within a few moments you now have local copies of that stuff. Edit or change any of those files or folders on one machine and the rest are synced to match.
Obviously if you go for one of the larger capacity options you'll be hammering your broadband connection pretty hard when it comes to data transfer, but Dropbox does include some basic bandwidth management.
Secure transfers
The service uses AES-256 bit encryption and all transfers are over an SSL connection for increased protection of your data. You can easily share your data publicly, meaning Dropbox is a great way of sharing large documents with others. Not only that, you can give users access to a folder for collaborative work.
Meanwhile the enclosing Dropbox folder is automatically backed up and you can undelete files or folders as well as restore previous versions of a file. So if you do accidentally overwrite a document it's quite easy to get it back again.
Dropbox works best if you have multiple Macs or, for that matter, PCs; if you have an iPhone or iPad there's also an app for that.
Having your documents synced and shared across multiple machines is really useful if that's part of your working scenario. You don't have to be worried about an internet connection as you can work on a document locally and simply sync it to all your other machines when you get back within Wi-Fi range.
There's a Dropbox web interface, so you don't have to download the client software to make changes to or access your stuff.
We've been testing Dropbox for many months in its beta incarnation and found it to be an invaluable space for storing and sharing documents. The 1.0 version of Dropbox is an excellent tool and deserves high praise. The seamless way it integrates into the workflow and its almost invisible nature makes it a great addition to any Mac, iOS device or, in fact, any computer you can get near.
Related Links
| |
| |
Read More ...
Review: Dropbox 1.0
Dropbox is one of those new web services that seems to have been around forever but that clings on to its 'beta' status. Only recently has Dropbox come out of beta and furnished us with a final first stab at a finished product. Dropbox 1.0 is an online storage service and by that definition there's nothing special about it at all. In fact, it seems strange that the service has become so popular given that iDisk exists, not to mention the other similar tools out there.
However, Dropbox has become a vital tool for some despite its beta status. The basic version gives you 2GB of online storage and you can pay to upgrade this should you need to.
Currently there are 50GB and 100GB options available at $9.99 (آ£6) a month and $20 (آ£13) a month.
Download the Dropbox tool and you get a new folder on your hard disk and an icon in the toolbar. It's not ground-shaking revolutionary stuff, that's for sure. However, the fact it acts almost invisibly is part of the application's power.
Once you've got a Dropbox account you simply start to use the storage area as you would any folder on your Mac. The stuff you copy to it is synced with the remote servers and that's it.
Now put a copy of Dropbox on your laptop or PC and within a few moments you now have local copies of that stuff. Edit or change any of those files or folders on one machine and the rest are synced to match.
Obviously if you go for one of the larger capacity options you'll be hammering your broadband connection pretty hard when it comes to data transfer, but Dropbox does include some basic bandwidth management.
Secure transfers
The service uses AES-256 bit encryption and all transfers are over an SSL connection for increased protection of your data. You can easily share your data publicly, meaning Dropbox is a great way of sharing large documents with others. Not only that, you can give users access to a folder for collaborative work.
Meanwhile the enclosing Dropbox folder is automatically backed up and you can undelete files or folders as well as restore previous versions of a file. So if you do accidentally overwrite a document it's quite easy to get it back again.
Dropbox works best if you have multiple Macs or, for that matter, PCs; if you have an iPhone or iPad there's also an app for that.
Having your documents synced and shared across multiple machines is really useful if that's part of your working scenario. You don't have to be worried about an internet connection as you can work on a document locally and simply sync it to all your other machines when you get back within Wi-Fi range.
There's a Dropbox web interface, so you don't have to download the client software to make changes to or access your stuff.
We've been testing Dropbox for many months in its beta incarnation and found it to be an invaluable space for storing and sharing documents. The 1.0 version of Dropbox is an excellent tool and deserves high praise. The seamless way it integrates into the workflow and its almost invisible nature makes it a great addition to any Mac, iOS device or, in fact, any computer you can get near.
Related Links
| |
Read More ...
Tutorial: How to speed up your Windows PC
The First Law of Computing states that, no matter how much money you spend on a PC, it's never quite fast enough. As a result, we're always looking for new ways to squeeze a bit more performance out of our systems. While there are plenty of speed-up guides available online, most deliver only minor variations on advice you already know: uninstall unwanted programs, disable any irrelevant services, clean up temporary files, defrag your hard drive and so on.
These are all good, solid tips, but if you're an experienced user, there comes a time when you want to move beyond the basics - to crank up the volume and hear something new.
Achieving this is easier than you might think, because your PC's OS includes a host of amazing ideas and technologies that rarely get much attention. Why? Sometimes they're too technical for the average home user.
Interrupt Affinity, for instance, allocates a specific processor to handle demands from a particular device, like your network card. Microsoft says this can improve a PC's performance, but it may take some work to find the best settings.
If you'd like to try it, check out Microsoft's guide (there's a discussion on real-life experiences available here).
Calculated risk
Exposing other technologies to public view may be seen as too risky. Windows 7 includes a new feature called the Fault Tolerant Heap, for example, which detects crashes caused by memory-handling issues and tries to fix them when the application is run again.
It has Registry settings that you can tweak to improve stability or reduce resource use, but if you get this wrong you could end up making your PC worse, so it's not something Microsoft boasts about.
If you're keen to take a look anyway, Technet has the details.
Other ideas tend to get forgotten. Install some programs, for instance, and they may add variables such as pointers to files or folders. When you uninstall your apps, some of these may be left behind. While this isn't a big issue, it may waste a little RAM or slow down the odd disc access, so there's no harm in looking. The Rapid Environment Editor will highlight errors for you.
In this article we'll reveal a little-known hard drive optimisation that could increase performance of some PCs by up to 50 per cent. We'll explain how you can persuade Windows 7's power plan settings dialog to reveal a host of CPU-related settings and tweaks.
We'll talk about network performance improvements introduced in Windows Vista and 7 that are turned off by default and will remain that way unless you know how to enable them. We'll discuss ways to remove unwanted drivers, disable an obscure, resource-hogging NTFS feature and squeeze the maximum power from your processor.
Remember, these aren't your average tuning techniques. Some will deliver real results, but several come with risks attached. It's therefore vital that you protect your data by activating System Restore and backing up your important files before changing anything.
Drivers
Just about every PC optimisation guide will recommend you uninstall unwanted programs to save resources. Some will also suggest disabling any unnecessary Windows services. This is sensible advice, but if you stop there you'll be ignoring a huge amount of clutter.
Drivers are installed by devices and many applications, but they're often left behind if you unplug the hardware or uninstall the program. Applications often install their own Windows services too, without you even realising.
Most optimisation guides won't cover these because they're not standard Windows services, but if you're looking to get the most from your PC then it may be worth removing some of them. Culling these will only deliver minimal benefits.
Removing failed (or multiple) driver installations can make your PC more stable though, and there's little more annoying than when you need to remove or replace a driver, but Windows keeps reinstalling it. Knowing how to kill a driver for good can be very useful.
Device Manager
The simplest way to begin culling unwanted drivers is with Device Manager. Of course 'simple' isn't always best, at least in this case: removing the wrong drivers can cause problems that might prevent your PC booting, even in safe mode. Don't try this unless you have a backup, and enough bootable recovery tools to cope if something goes wrong.
For another view on your drivers, open a command window (right-click the 'cmd.exe' window and select 'Run as administrator' in Windows Vista or 7), and enter the command pnputil -e. This will display all your third-party drivers - everything you and your installed apps have added to Windows.
For the most part, these won't be doing any harm beyond occupying a little hard drive space and maybe a few Registry references. If you find a driver that you know isn't system-critical and you want to delete it (so you can reinstall it more easily, perhaps), make a note of its 'Published name' and enter the command pnputil -d oem12.inf, where 'oem12.inf' is replaced by the file name on your system.
If Windows tells you the device is in use, you can force deletion with the -f switch like this: pnputil -f -d oem12.inf. You need to be sure that Windows can cope without it.
Third-party services are easier to review. Just launch 'MSCONFIG.EXE', click 'Services', check 'Hide all Microsoft services' and look for items you don't need. Apple Mobile Device and Bonjour Service, installed with iTunes, are good examples. If you don't have an iPod, iPhone or other Apple device and don't use Bonjour (a network discovery tool), they're unnecessary.
If you spot something like this that's running and you're sure you don't need it, launch the Services applet ('services.msc'), then find and double-click it for more information. If you're positive that the service is unnecessary, set its 'Startup type' to 'Disabled' to turn it off when you next reboot.
Clean up your system with Device Manager
If you suspect that your PC is suffering driver problems, launch the Device Manager tool from Control Panel (or run 'devmgmt.msc' directly). If a device has a problem, its section will be expanded and it'll be highlighted with a yellow exclamation mark.
Double-click the faulty driver, click the 'Driver' tab and use the 'Update driver', 'Disable' or 'Uninstall' button to solve the problem. Device Manager won't show you all the drivers installed on your PC by default, but a quick tweak will change that and you'll soon be removing any unwanted junk.
1. Setup
Right-click 'Computer', select 'Properties' and click 'Advanced (system settings) | Environment variables | New'. Enter DEVMGR_SHOW_NONPRESENT_DEVICES for your variable name, 1 for the value and click 'New | OK'.
2. Hunt for junk
Launch Device Manager, click 'View | Show hidden devices' and you'll see a 'Non-plug and play drivers' section. Expand this to see leftovers from past installations (we found 13 McAfee drivers on a PC with no McAfee software).
3. Clean up
If you see a device that relates to something you've uninstalled (and nothing else), its icon is greyed out and your system is backed up in case of problems, then you can remove it. Right-click the entry and select 'Uninstall | OK'.
How to speed up your internet connection
Does your internet connection tend to be rather slow and unreliable? If so, Windows has a great selection of handy tweaks and technologies that might be able to help - if you can find them and put them to use safely.
Network connections normally start transfers by sending small blocks of data, for instance, increasing these in size only gradually. Compound TCP (CTCP) ramps up your window size more aggressively, often improving performance.
It's turned off in Windows Vista and 7 by default, but you can restore it by launching an elevated command prompt and entering netsh int tcp set global congestionprovider=ctcp.
If you encounter problems, re-enter the command with =none to turn it off, or =default for the default value.
Windows 7 also introduced Direct Cache Access (DCA), which reduces system overheads by allowing a network controller to transfer data directly into a CPU cache (if your system supports it). This is turned off by default, but can be activated with a netsh command: netsh int tcp set global dca=enabled. Use =disabled to turn it off if it doesn't help.
You can use the same tool to activate Explicit Congestion Notification (ECN) - a technology that helps your system cope with network congestion without dropping packets. Remember, if you're downloading big files and not suffering from congestion, this can slow your system down.
Check your PC to see ECN's status. If it's off and your system supports it, entering netsh int tcp set global ecncapability=enabled will turn ECN on (=disabled will turn the technology off, and =default sets the default setting). Test your connection to look for improvement.
All these features can give your CPU more work to do, but in many cases this can be minimised by allowing your network card's processor to handle the connection. This should be activated automatically, but it's not clear that this always happens. Even Microsoft recommends enabling the feature manually (if your network card supports it) so it's worth a try.
Enter netsh int tcp set global chimney=enabled to turn the feature on, or use =disabled to turn it off.
Registry tweaks to speed up your network
There are plenty of brilliant network-related Registry settings available. Launch REGEDIT, browse to 'HKLM\System\CurrentControlSet\Services\LanmanWorkstation\Parameters', then consider some of these possibilities.
Windows throttles traffic on networks with high latencies (delays), reducing timeouts but slowing you down. To disable this, add a DWORD value called 'Disable Bandwidth Throttling' to '\Lanman Workstation\Parameters' and set it to '1'.
The system is equally cautious with TCP auto-tuning, disabling it if there's any chance your system won't support it. Add a DWORD value called EnableWsd and set it to '0' to disable these diagnostics and keep auto-tuning on regardless.
Your home PCs cache data about files and folders they access. Increasing the cache size uses more RAM, but can reduce network traffic and improve speeds.
Add FileInfoCacheEntriesMax, DirectoryCacheEntriesMax and FileNotFoundCacheEntriesMax DWORD values to '\LanmanWorkstation\Parameters', set them to values greater than their defaults (64, 16 and 128), reboot and see what happens.
Be careful and if you have any issues, return to the Registry key you've added, delete it, reboot and your PC will be back to normal.
How to speed up your CPU
Windows 7 adds support for several new CPU features that reduce energy use, which sounds great - except some say they compromise performance. Worse, all these settings are hidden by default, however that can be changed.
Enter the following two commands at the command prompt: powercfg -attributes SUB_PROCESSOR 0cc5b647-c1df-4637-891a-dec35c318583-ATTRIB_HIDE and powercfg -attributes SUB_PROCESSOR ea062031-0e34-4ff1-9b6deb1059334028-ATTRIB_HIDE.
Now go to 'Control Panel | Power options | Change plan settings (for your current plan) | Change advanced power settings | Processor power management'. You'll see two new options: 'Processor performance core parking min cores' and 'Processor performance core parking max cores'.
These settings related to Core Parking, a feature that allows your CPU to turn off some cores to save power when your system load is minimal. While generally a good thing, some say it causes problems, and recommend turning parking off. Set 'Min cores' and 'Max cores' to 100 and reboot your machine to make this happen.
Need more tweaks? There are plenty, including additional Core Parking options, performance management, idle states and more. Download Microsoft's guide to Processor Power Management and locate a setting of interest.
Copy its GUID from the document - 'Allow throttle states' is '3b04d4fd-1cc7-4f23-ab1c-d1337819c4bb', for instance - and build a command along the lines of powercfg -attributes SUB_ PROCESSOR 3b04d4fd-1cc7-4f23-ab1c-d1337819c4bb-ATTRIB_HIDE.
Enter this at the command line and the new setting will be visible. (Use +ATTRIB_HIDE at the end to hide it again.)
Keep in mind that there's a reason why many of these tweaks are hidden, though. If you disable PC idle states, for instance, you may gain a tiny amount in terms of performance, but your CPU could also run very hot, shortening its life.
Change your settings carefully, ideally monitoring details like temperature for any changes. CPU scheduling PCs are always busy, with far more processes active then there are CPU cores available. Windows manages this by running each thread for a brief period, called a quantum. When that time is up, the scheduler looks for other apps that need the CPU and runs one of those.
By default, this system triples the quantum for the foreground application, and generally does a good job of sharing processor time. But if you want to improve things, there are a couple of ways to do it.
One option is to use the Windows Server scheduling settings. These don't optimise the foreground application, so your user interface won't feel so snappy, but they provide a quantum six times longer than usual, minimising overheads and improving CPU efficiency.
To try this, right-click 'Computer,' click 'Advanced' (then 'Performance settings | Advanced' in Vista or later) and set 'Adjust for best performance of' to 'Background services'.
Or you can customise your quantum manually. Run 'REGEDIT', browse to 'HKEY_LOCAL_MACHINE\SYSTEM\CurrentControlSet\Control\ PriorityControl', set 'Win32 PrioritySeparation' to '16 (Hex)', and you'll get a long quantum that also optimises the foreground app - a good compromise.
Registry tweaks to speed up your PC
Windows is full of Registry tweaks that can optimise your PC for a variety of tasks. When the OS boots, for instance, it creates threads to carry out system tasks. Adding more can improve performance on a busy PC, or waste resources if there's not much to do.
To give this a try, go to 'HKLM\SYSTEM\CurrentControl Set\Control\SessionManager\Executive' in the Registry, create a DWORD value called 'Additional Critical WorkerThreads' and set it to something between 1 and 16 (decimal). Then add a DWORD value called 'AdditionalDelayed WorkerThreads' in the same location and use the same value. Reboot and test your system.
If you're running applications that perform many network operations at once, you can benefit from increasing the number of commands that you can cache. Go to 'HKLM\SYSTEM\CurrentControlSet\Services\Lanman Workstation\Parameters', create a DWORD value called 'MaxCmds' and try setting it to 64. Delete the value to restore the default setting.
Some versions of Windows run the driver verifier at random to check your drivers. This is good if it uncovers problems, but otherwise it slows you down.
To turn it off, go to 'HKLM\SYSTEM\CurrentControlSet\Control\FileSystem', add a DWORD value 'DontVerifyRandomDrivers' and set it to 1.
Windows Vista and 7 networks support Large MTU, which sees the maximum size of a data packet increased from 64kB to 1MB. If you have ultra-fast network kit, this may improve performance, but if not, it'll cause problems.
Want to try it? Go to 'HKLM\system\CurrentControlSet\Services\LanmanWorkstation\Parameters', set 'DisableLargeMTU' to 0 and reboot. Apply the same setting to your other network PCs and look for improvements. Set the value to 1 to restore the default setting.
Temporary files
Usually you'll enter the Registry to tweak a setting, but sometimes viewing existing settings can be useful. For the perfect example, go to 'HKEY_LOCAL_MACHINE\SYSTEM\ControlSet001\Control\BackupRestore\FilesNotToBackup'.
As you might guess from the final key name, this contains a list of system folders that backup tools should ignore, usually because they contain temporary files. This is a list of places that may contain large amounts of cached files, perfect for further exploration.
Of course. you shouldn't delete these straight away; many contain useful data - some of the time. Our test PC did include '%windir%\softwaredistribution\*.* /s' though - that's '\Windows\ SoftwareDistribution' and all its subfolders.
A visit to Google told us the folder is related to Windows Update, and can be emptied if you're careful (see method 10 at http://support.microsoft.com/kB/822798). This contained 5GB of files, so we wiped them and recovered the hard drive space.
Filesystem tweaks
You can improve your hard drive speeds by up to 50 per cent with this effective tweak.
One of the most effective conventional PC optimisation techniques you can try is simply to defrag your hard drive, rearranging its files for optimum performance. Something like Auslogics Disk Defrag will do the job for free, and it's so effective that you might think there's no need to do anything else.
But, as we've seen, Windows has many potential speed issues that are far from obvious, and hard drives have one of the most significant: partition alignment. In certain cases, if your system isn't set up correctly, then its drive performance can be cut by anything up to 50 per cent, so it's an issue you really need to consider.
The partition alignment problem is based around the way data is stored on your hard drive. You've probably seen diagrams of this before, showing how files are stored in units of a minimum size, called a cluster, and it's easy to imagine how this might work.
Let's say that your application needs a file, and this happens to be stored in cluster number 123,456. Windows asks your hard drive for that cluster number, the drive loads the information and sends it back. It sounds easy, but unfortunately it's not quite this simple in practice.
In reality, hard drives have a physical layer of sectors. These are overlaid by a logical layer of clusters, created when your hard drive is formatted. There may be other layers, too, but these are enough to describe the problem.
Unfortunately, the logical layer has historically assumed that drives use a 512-byte sector size, and started your partition after 63 sectors. Modern hard drives often use a 4kB sector size, and logical partitions following the 63 sector rule therefore don't align with the physical sector of the drive.
What does all this mean for your PC? If your application really needs a file in logical cluster number 123,456, then your hard drive might have to read physical sectors 123,455 and 123,456 to return the necessary data. This doesn't mean every read and operation will take twice as long as it should; drive geometry, caching and other factors reduce the overhead considerably. Still, it's potentially a serious problem. So does it apply to you?
Partition alignment
The good news is that most people's PCs are unlikely to be affected by partition alignment issues. If your hard drive was formatted by Windows Vista or 7, for instance, then it should be fine (Microsoft fixed its partitioning after the release of Windows XP). If you only have one hard drive then Microsoft says you're also less likely to be suffering any speed issues.
However, if your system has multiple drives organised in a RAID setup, or even just a single SSD, and they were partitioned by Windows XP (or anything else that doesn't understand alignment) then performance may be compromised. And there are drives, like Western Digital's Caviar Green series, that use an internal 4kB sector, yet for legacy reasons report a 512kB sector to Windows. These could slow down if they're misaligned, even on single drive systems.
There's no need to panic here, then. Your system is probably fine, but it's wise to check anyway. To make this easier, Paragon Software has developed an Alignment Tool that scans your PC for mismatched partitions, and if it finds any, gives you the option to move and realign them.
Keep in mind that realignment is a slow process, though. We deliberately set it a 'worst case' test, realigning a 1TB USB drive, and it took more than 12 hours. This may be an issue, especially because it can't be cancelled, and if there are any problems or interruptions then you could lose everything on the drive.
It's therefore vital to back up your complete system before you start, and you must give the program a great deal of time to work. Letting it run overnight would be a good idea. But with your safeguards in place, you can then give the program a try.
The results you'll get from this process vary depending on your particular drive and hardware: some people report little or no benefit, while others see major improvements. Even if the performance gains are minimal, though, cutting the number of read and write operations will help to extend your drive's life, and that alone makes it worth the effort.
NTFS tunnelling
Hard drives are subject to many other odd issues beyond partition alignment, but few are quite as strange as NTFS tunnelling.
When you delete a file, the tunnelling system caches its creation date, short and long name for a few seconds. It does this so that programs that modify documents by creating a temporary file, deleting the original, and renaming the temporary to the original name, will appear to have the original file when the process is complete (the short name and creation date will be the same).
This process requires RAM and a little CPU time, though, and can slow you down when you need to delete large numbers of files. This is because Windows has no way to know you won't be recreating them, so always caches their details. It may also be entirely unnecessary. Short file names are only important for 16-bit apps, for instance. And your application may handle the file creation date issue itself, or you may not care about it at all.
If you'd like to try disabling tunnelling, then, run REGEDIT and browse to HKEY_LOCAL_ MACHINE\SYSTEM\CurrentControlSet\Control\FileSystem. Create a new DWORD value called MaximumTunnelEntryAgeInSeconds, set it to zero, reboot your machine and see what happens.
Keep in mind that, like many of these tweaks, turning off tunneling can have odd and unexpected effects. Test your system carefully to confirm that everything is working as it should. If you experience any problems, simply delete the MaximumTunnel EntryAgeInSeconds value and reboot to restore your PC to normal.
Solve printer problems
Printers don't cause many problems, but you may experience crashes that relate to the printer spooler service ('spoolsv.exe'). If your PC starts experiencing printer-related crashes, this can often be tracked down to a program that's changed a core printer-related component. It sounds like it should be simple to solve, but this level of printer management has no user interface, and most people don't even know that it exists, so it's not exactly easy to fix.
Unless, that is, you know where to look in the Registry, where you can quickly and easily restore the problematic components to their defaults. As ever, make sure you back up your system and Registry first, then try this.
1. Printer driver
Launch 'services.msc', right-click 'Print spooler' and select 'Stop'. Launch 'REGEDIT' and browse to 'HKLM\SYSTEM\CurrentControlSet\Control\Print\Monitors\Local Port'. Double-click 'Driver' and ensure it's set to 'localspl.dll'.'
2. Port monitor
Go to 'HKLM\SYSTEM\CurrentControlSet\Control\Print\Monitors'. Defaults here include 'Microsoft shared', 'Standard TCP/IP', 'Local port' and 'USB monitor'. Remove others you've installed - you must have System Restore activated.
3. Print provider
Go to 'HKEY_LOCAL_MACHINE\SYSTEM\CurrentControlSet\Control\Print\Providers' and rename any print provider other than 'Internet print' or 'LanMan print' to have a '.old' extension. Restart your Print Spooler and try again.
| |
Read More ...
Review: Nova Media UberMask
 UberMask keeps private files and folders safe from prying eyes. By pressing user configured key combinations, you can instantly hide or reveal selected files.
 Hidden files are invisible to Finder and Spotlight, and wherever possible, erased from recently used lists.
Any file managed by UberMask is hidden when you shut down your Mac – this feature can’t be changed. It’s great for preserving your privacy.
Sensitive material can be concealed from others who use your Mac, or from casual observers who might spot it over your shoulder – just the thing if you’re using your Mac in public or at work. It’s also a boon for screencasting or desktop captures; you can quickly and easily hide icons.
Compared to its main rival, MacPaw’s MacHider, UberMask offers better convenience but isn’t as versatile when managing hidden files. And a few glaring omissions keep it from fulfilling its potential.
Unlike MacHider, it can only hide files stored on the boot volume, and although it demands a password on launch, you can’t password-protect the app itself.
Also, like MacHider, UberMask hides files by adding a full stop to the start of filenames. But this isn’t very secure; some apps let you see these files. So, UberMask is a welcome means of hiding sensitive files, but it won’t stop a clued-in hacker.
Related Links
| |
| |
Read More ...
Review: Nova Media UberMask
UberMask keeps private files and folders safe from prying eyes. By pressing user configured key combinations, you can instantly hide or reveal selected files. Hidden files are invisible to Finder and Spotlight, and wherever possible, erased from recently used lists.
Any file managed by UberMask is hidden when you shut down your Mac – this feature can’t be changed. It’s great for preserving your privacy.
Sensitive material can be concealed from others who use your Mac, or from casual observers who might spot it over your shoulder – just the thing if you’re using your Mac in public or at work. It’s also a boon for screencasting or desktop captures; you can quickly and easily hide icons.
Compared to its main rival, MacPaw’s MacHider, UberMask offers better convenience but isn’t as versatile when managing hidden files. And a few glaring omissions keep it from fulfilling its potential.
Unlike MacHider, it can only hide files stored on the boot volume, and although it demands a password on launch, you can’t password-protect the app itself.
Also, like MacHider, UberMask hides files by adding a full stop to the start of filenames. But this isn’t very secure; some apps let you see these files. So, UberMask is a welcome means of hiding sensitive files, but it won’t stop a clued-in hacker.
Related Links
| |
Read More ...
Tutorial: Guide to Mac OS X File Sharing
 You're sat in the lounge with your family, and you want to show them your holiday videos on the Mac mini you use as a media centre. But the videos are on your iMac. How do you transfer them?
 Or maybe you've just finished a Keynote presentation, and need to share it with a colleague who has his own user account on your Mac. It's too big to email, so how do you get it to him?
You could use a USB stick, or email smaller files to yourself. Or for your home network, you could invest in a network attached storage (NAS) drive, accessible to everyone. But there's another way.
Using OS X's file-sharing abilities, you can define a folder as 'shared', enabling other computers on your network - and other user accounts on your Mac - to access them. Privileges can be set to give different access rights to different accounts, allowing people or groups to read, write or both.
Every OS X user account has a Public folder, which is used to share files with other people. It's always accessible to other user accounts on the same machine, and if File Sharing is enabled, it can be used to share files over a network too.
Your Public folder is found in Hard Drive/Users/[username]. Inside is another folder called Drop Box. By default, anyone connected to your Mac can read from (and copy files from) your Public folder, and write to (but not open) the Drop Box, though this can be configured if you wish. File Sharing also lets you define other folders as publicly accessible.
To activate and configure your Mac's File Sharing function, you must be logged on as an administrator, or at least know an administrator's username and password. Under the Apple menu, choose System Preferences. Open the Sharing pane - the one that looks like a folder with a figure in a yellow diamond on it.
If you're logged into an account that doesn't have administrator privileges, click on the lock in the bottom-left corner of the window, and enter the name and password of an administrator. If you're using an admin account, it should already be open.
File-sharing function

Click on the check box labelled File Sharing to enable this feature. Your public folder is now accessible to other users on the network, and can be accessed by clicking on your computer in the Shared column in a Finder window's side bar (if the side bar is missing, toggle it on or off by pressing the pill-shaped button in the top-right corner).
You can now make files accessible to others by moving or copying them to your Public folder, and they can give files to you by putting them in your Drop Box folder, which everyone can see, but only you can open.
Once again, these are default settings, and can be configured to behave differently, as we'll cover in more depth later. But what if you want to share other folders?
For example, to give everyone in your house access to your Movies folder, without moving it into your Public folder? To do this, we must define Movies (or indeed any folder) as 'shared'. With File Sharing highlighted, two panels appear to the right, one titled Shared Folders and one called Users. Both have little boxes underneath labelled '+' and '-'.
To share a folder with everyone on your network, press the '+' button under the Shared Folders panel and navigate to the folder to share. To remove a folder from this list, highlight it and press the '-' button.
The Users panel

The Users panel allows you to set privileges for individuals and groups. In the Shared Folders panel, select the folder you wish to affect. The Users panel shows the access rights currently enjoyed by yourself and others.
By pressing the '+' button under the panel, you can add individual users and groups. Again, highlight and press '-' to remove them.
New user or group accounts can be created in the Accounts system preference, or you can set up a new user without creating a new account on your Mac by pressing the New Person button in the dialog window that appears when you press '+'. A password can also be set for this new person.
To add him or her to the Users panel, highlight his or her new account and press Select. By default, a new user or group added to the Users list has Read Only access. To change this, click on the words Read Only and select another option from the pull-down.
Read Only access means that a person or group can open that folder and take files, but cannot put anything in it or edit files that are already there. Write Only access is the exact opposite - the user can copy files into that folder for the account holder to use, but cannot open it or take anything from it. A person or group with Read & Write privileges has full access to that folder, and can open, edit or take files, copy data to the folder or delete items.
The group titled Everyone is a global setting, and can also be set to the self-explanatory No Access. Note that if a user account is set up for someone who's also a member of a group, personal settings override group restrictions.
For example, if Fred Smith is given Read & Write access, but he's included in a group that has Write Only privileges, Fred can Read & Write.
An alternative way of creating and managing shared folders exists, apart from System Preferences. In Finder, highlight the folder you want to share, and press Command+i or right-click and select Get Info. This brings up that folder's Info window. At the foot of the General section is a check box entitled Shared Folder. Checking this makes it shared (if you check it with File Sharing off, you're invited to activate this feature).
At the foot of the Info window, in a section labelled Sharing & Permissions, you can set read and write privileges. If you want to share with computers running Windows or Linux, you have to activate the necessary network protocols to allow your Mac to communicate with the operating system that needs to access your files.
In the Sharing preference pane, click on Options. Apple Filing Protocol (AFP) is active by default, and allows you to share with Macs. To share with Linux and Unix systems, check the File Transfer Protocol (FTP) box. You're given a server address for Linux/Unix users to access, or they can browse for your computer by name. To share with Windows users, check the Server Message Block (SMB) box.
Check the user accounts you wish to enable for SMB, and enter the password for that account. When you're ready, click Done to finish.
MobileMe benefits

Of course, MobileMe subscribers have another option. MobileMe's iDisk feature gives you 20GB of cloud storage, and a couple of easy ways to share your files with others. By uploading a file to your iDisk's Public folder, it can be downloaded by anyone.
To upload a file to iDisk through Finder, select iDisk from a Finder window's side bar or click on Finder's Go pull-down menu, scroll down to iDisk and select My iDisk. If you're not already logged on in System Preferences, you have to enter your details when prompted. You can then transfer files to any of your iDisk folders (including Public) through the Finder.
Alternatively, upload from the MobileMe website. Go to www.me.com and log in to your account. Click on the cloud icon in the top-left corner, and switch to iDisk. Select the folder you wish to upload to, and press the up arrow in the blue bar at the top of the website.
Now, navigate to the file you want to upload. If you want to password-protect your iDisk's Public folder, in the iDisk section of www.me.com, click the cog icon in the top bar and select Preferences; here you can opt to set, change or remove a password. You can also edit permissions to write to or delete files from the Public folder.
To access another user's Public folder from your own Mac, in Finder's Go menu, select iDisk > Another User's Public Folder. Enter the MobileMe account name of the person whose Public folder you wish to access, and the password if necessary. You can now download files from that person's folder, and also upload and delete files, if they've enabled this in their iDisk preferences.
Note that your iDisk's Public folder is stored on a cloud server as part of your MobileMe account's alloted storage space, and is not the same as your OS X account's Public folder.
If you want to give someone access to a specific file on your iDisk without putting it into the Public folder, you can invite them to download it by email. Log onto www.me.com/idisk, and navigate to the file you wish to share. Click on it, and then click on the Share File button in the right-hand column.
You're then given a URL at which the file can be downloaded. Enter the email address of the person you want to share it with and a message in the fields provided, and press Share; the URL is emailed, and the recipient can download the file just by clicking on the link. If you want to send the email from an account other than your me.com address, you can copy and paste the URL and leave the email and message fields blank. You still have to click on Share, though, or the file won't be shared and the link won't work.
Finally, MobileMe service Back to My Mac is an easy and convenient way of remotely accessing another Mac that's logged into the same account, from both your home network and over the internet. It's a great way of using your notebook to retrieve files from your home machine while out and about, but it must be switched on if you're to do it.
How to activate and use OS X File Sharing
1. System Preferences

Open System Preferences from the Apple menu, and go into the Sharing preference pane, found in the Internet & Wireless section. It looks like a folder badged with a stick man on a yellow diamond. It's here that you activate File Sharing, and other sharing services.
2. Switch File Sharing on

Click the File Sharing check box to turn on File Sharing. You'll need to be an administrator, or know an admin's name and password. File Sharing is switched on, and a list of currently shared folders appears in the central panel. Each user account has its own shared Public folder.
3. Add folder to share

To define another folder as shared, click the '+' button under the Shared Folders panel. Navigate to the folder you wish to share (such as Movies, as shown here) and click on Add. It appears in the Shared Folders panel. If you want to unshare a folder, highlight it and click '-'.
4. Add users

You can add new users in the Users panel. Highlight the shared folder you wish to give access to, and click the '+' button under the panel. Choose a user or group that's already set up in the Accounts pane, or click New Person.
5. Access Privileges
Modify a user's access privileges via the pull-downs in the second column of the Users panel. Read & Write gives full access to a folder, Read Only lets them take files but not put any in, and Write Only lets them copy to, not from it.
6. Use the Info Window

Most of these functions can be accessed via a folder's Info window. Highlight the folder in question, press Command-i, or right-click and select Get Info. From this window, you can share and unshare the folder and modify permissions.
| |
| |
Read More ...
Tutorial: Guide to Mac OS X File Sharing
You're sat in the lounge with your family, and you want to show them your holiday videos on the Mac mini you use as a media centre. But the videos are on your iMac. How do you transfer them? Or maybe you've just finished a Keynote presentation, and need to share it with a colleague who has his own user account on your Mac. It's too big to email, so how do you get it to him?
You could use a USB stick, or email smaller files to yourself. Or for your home network, you could invest in a network attached storage (NAS) drive, accessible to everyone. But there's another way.
Using OS X's file-sharing abilities, you can define a folder as 'shared', enabling other computers on your network - and other user accounts on your Mac - to access them. Privileges can be set to give different access rights to different accounts, allowing people or groups to read, write or both.
Every OS X user account has a Public folder, which is used to share files with other people. It's always accessible to other user accounts on the same machine, and if File Sharing is enabled, it can be used to share files over a network too.
Your Public folder is found in Hard Drive/Users/[username]. Inside is another folder called Drop Box. By default, anyone connected to your Mac can read from (and copy files from) your Public folder, and write to (but not open) the Drop Box, though this can be configured if you wish. File Sharing also lets you define other folders as publicly accessible.
To activate and configure your Mac's File Sharing function, you must be logged on as an administrator, or at least know an administrator's username and password. Under the Apple menu, choose System Preferences. Open the Sharing pane - the one that looks like a folder with a figure in a yellow diamond on it.
If you're logged into an account that doesn't have administrator privileges, click on the lock in the bottom-left corner of the window, and enter the name and password of an administrator. If you're using an admin account, it should already be open.
File-sharing function
Click on the check box labelled File Sharing to enable this feature. Your public folder is now accessible to other users on the network, and can be accessed by clicking on your computer in the Shared column in a Finder window's side bar (if the side bar is missing, toggle it on or off by pressing the pill-shaped button in the top-right corner).
You can now make files accessible to others by moving or copying them to your Public folder, and they can give files to you by putting them in your Drop Box folder, which everyone can see, but only you can open.
Once again, these are default settings, and can be configured to behave differently, as we'll cover in more depth later. But what if you want to share other folders?
For example, to give everyone in your house access to your Movies folder, without moving it into your Public folder? To do this, we must define Movies (or indeed any folder) as 'shared'. With File Sharing highlighted, two panels appear to the right, one titled Shared Folders and one called Users. Both have little boxes underneath labelled '+' and '-'.
To share a folder with everyone on your network, press the '+' button under the Shared Folders panel and navigate to the folder to share. To remove a folder from this list, highlight it and press the '-' button.
The Users panel
The Users panel allows you to set privileges for individuals and groups. In the Shared Folders panel, select the folder you wish to affect. The Users panel shows the access rights currently enjoyed by yourself and others.
By pressing the '+' button under the panel, you can add individual users and groups. Again, highlight and press '-' to remove them.
New user or group accounts can be created in the Accounts system preference, or you can set up a new user without creating a new account on your Mac by pressing the New Person button in the dialog window that appears when you press '+'. A password can also be set for this new person.
To add him or her to the Users panel, highlight his or her new account and press Select. By default, a new user or group added to the Users list has Read Only access. To change this, click on the words Read Only and select another option from the pull-down.
Read Only access means that a person or group can open that folder and take files, but cannot put anything in it or edit files that are already there. Write Only access is the exact opposite - the user can copy files into that folder for the account holder to use, but cannot open it or take anything from it. A person or group with Read & Write privileges has full access to that folder, and can open, edit or take files, copy data to the folder or delete items.
The group titled Everyone is a global setting, and can also be set to the self-explanatory No Access. Note that if a user account is set up for someone who's also a member of a group, personal settings override group restrictions.
For example, if Fred Smith is given Read & Write access, but he's included in a group that has Write Only privileges, Fred can Read & Write.
An alternative way of creating and managing shared folders exists, apart from System Preferences. In Finder, highlight the folder you want to share, and press Command+i or right-click and select Get Info. This brings up that folder's Info window. At the foot of the General section is a check box entitled Shared Folder. Checking this makes it shared (if you check it with File Sharing off, you're invited to activate this feature).
At the foot of the Info window, in a section labelled Sharing & Permissions, you can set read and write privileges. If you want to share with computers running Windows or Linux, you have to activate the necessary network protocols to allow your Mac to communicate with the operating system that needs to access your files.
In the Sharing preference pane, click on Options. Apple Filing Protocol (AFP) is active by default, and allows you to share with Macs. To share with Linux and Unix systems, check the File Transfer Protocol (FTP) box. You're given a server address for Linux/Unix users to access, or they can browse for your computer by name. To share with Windows users, check the Server Message Block (SMB) box.
Check the user accounts you wish to enable for SMB, and enter the password for that account. When you're ready, click Done to finish.
MobileMe benefits
Of course, MobileMe subscribers have another option. MobileMe's iDisk feature gives you 20GB of cloud storage, and a couple of easy ways to share your files with others. By uploading a file to your iDisk's Public folder, it can be downloaded by anyone.
To upload a file to iDisk through Finder, select iDisk from a Finder window's side bar or click on Finder's Go pull-down menu, scroll down to iDisk and select My iDisk. If you're not already logged on in System Preferences, you have to enter your details when prompted. You can then transfer files to any of your iDisk folders (including Public) through the Finder.
Alternatively, upload from the MobileMe website. Go to www.me.com and log in to your account. Click on the cloud icon in the top-left corner, and switch to iDisk. Select the folder you wish to upload to, and press the up arrow in the blue bar at the top of the website.
Now, navigate to the file you want to upload. If you want to password-protect your iDisk's Public folder, in the iDisk section of www.me.com, click the cog icon in the top bar and select Preferences; here you can opt to set, change or remove a password. You can also edit permissions to write to or delete files from the Public folder.
To access another user's Public folder from your own Mac, in Finder's Go menu, select iDisk > Another User's Public Folder. Enter the MobileMe account name of the person whose Public folder you wish to access, and the password if necessary. You can now download files from that person's folder, and also upload and delete files, if they've enabled this in their iDisk preferences.
Note that your iDisk's Public folder is stored on a cloud server as part of your MobileMe account's alloted storage space, and is not the same as your OS X account's Public folder.
If you want to give someone access to a specific file on your iDisk without putting it into the Public folder, you can invite them to download it by email. Log onto www.me.com/idisk, and navigate to the file you wish to share. Click on it, and then click on the Share File button in the right-hand column.
You're then given a URL at which the file can be downloaded. Enter the email address of the person you want to share it with and a message in the fields provided, and press Share; the URL is emailed, and the recipient can download the file just by clicking on the link. If you want to send the email from an account other than your me.com address, you can copy and paste the URL and leave the email and message fields blank. You still have to click on Share, though, or the file won't be shared and the link won't work.
Finally, MobileMe service Back to My Mac is an easy and convenient way of remotely accessing another Mac that's logged into the same account, from both your home network and over the internet. It's a great way of using your notebook to retrieve files from your home machine while out and about, but it must be switched on if you're to do it.
How to activate and use OS X File Sharing
1. System Preferences
Open System Preferences from the Apple menu, and go into the Sharing preference pane, found in the Internet & Wireless section. It looks like a folder badged with a stick man on a yellow diamond. It's here that you activate File Sharing, and other sharing services.
2. Switch File Sharing on
Click the File Sharing check box to turn on File Sharing. You'll need to be an administrator, or know an admin's name and password. File Sharing is switched on, and a list of currently shared folders appears in the central panel. Each user account has its own shared Public folder.
3. Add folder to share
To define another folder as shared, click the '+' button under the Shared Folders panel. Navigate to the folder you wish to share (such as Movies, as shown here) and click on Add. It appears in the Shared Folders panel. If you want to unshare a folder, highlight it and click '-'.
4. Add users
You can add new users in the Users panel. Highlight the shared folder you wish to give access to, and click the '+' button under the panel. Choose a user or group that's already set up in the Accounts pane, or click New Person.
5. Access Privileges
Modify a user's access privileges via the pull-downs in the second column of the Users panel. Read & Write gives full access to a folder, Read Only lets them take files but not put any in, and Write Only lets them copy to, not from it.
6. Use the Info Window
Most of these functions can be accessed via a folder's Info window. Highlight the folder in question, press Command-i, or right-click and select Get Info. From this window, you can share and unshare the folder and modify permissions.
| |
Read More ...
Buying Guide: Which is the best HTC phone?
 Our constantly updated list of the best HTC phones.
So you've decided that HTC is the brand you want to spend the next 24 months of your life with - but that's not the end of the quest.
You have a plethora of devices, price points and operating systems to choose from and it can all get a little bewildering. But which is the best HTC phone for you?
Thankfully TechRadar is on hand to help you out - check out our run down of all the HTC phones around at the moment:
HTC Incredible S

OS: Android 2.2
The HTC Incredible S is rather nice piece of kit, but has a very odd rear - the innards are vacuum packed to the case, giving the impression of a much thinner phone than it actually is.
The OS is still only Android 2.2, and we'd have hoped for a spot of Gingerbread on a cutting edge handset like this - but a decent camera, slick UI and bright 4-inch screen make this a worthy contender for you HTC dollar.
Read our full HTC Incredible S review
HTC Gratia

OS: Android 2.2
The HTC Gratia is a curious device; if you're after an everyday smartphone at a reasonable price, this could more than ably scratch that itch. In fact, we'd recommend it over many other phones in this bracket. It's very similar to the HTC Wildfire in terms of spec, although does have a smarter chassis design.
If, however, you'd prefer a powerhouse packed with cutting-edge features, there's no doubt that this is too much of a compromise to satisfy. Camera cognoscenti also need not apply.
Read our full HTC Gratia review
HTC 7 Pro

OS: Windows Phone 7
Bringing a portrait QWERTY keyboard to proceedings, the HTC 7 Pro offers the simple Windows Phone 7 interface combined with physical buttons. However, the key design is a little poor, and the chassis is quite chunky too - although if you're hankering for a slide out keyboard and a Microsoft Mobile OS, this wouldn't be the worst option for you.
Read our full HTC 7 Pro review
HTC Desire HD

OS: Android 2.2
The super-sized HTC Desire HD is HTC's attempt to take smartphones to the next level and the HD features a flawless interface and fantastic web browser. Battery life isn't great, though, and it's a little on the large side.
Read our full HTC Desire HD review
HTC Desire Z
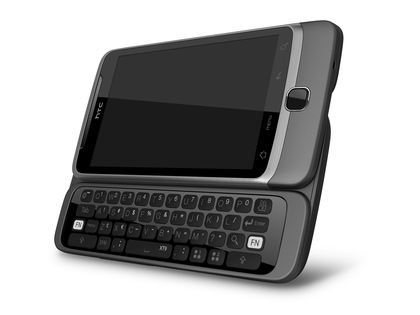
OS: Android
An Android phone with a full QWERTY keyboard - so if a physical keyboard is a must on an Android phone, then this is the handset for you.
Read our full HTC Desire Z review
HTC HD7

OS: Windows Phone 7
With a 4.3-inch screen, this phone is huge, and while we're fans of its size some may instantly dismiss it as too big.
Read our full HTC HD7 review
HTC 7 Mozart
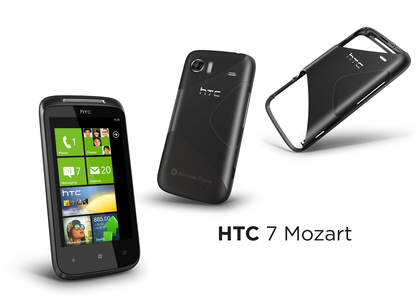
OS: Windows Phone 7
The HTC Mozart features a 1GHz processor, 3.7-inch WVGA screen, an eight-megapixel camera with Xenon flash and 720p HD video recording as well as all 3G and Wi-Fi connectivity.
Read our full HTC 7 Mozart review
HTC 7 Trophy

OS: Windows Phone 7
The Trophy looks to be the cheapest of the HTC phones running WP7. آ£25 a month is ridiculously cheap for a phone that offers a 5MP camera, HD video recording, a dedicated GPU and the new Windows Phone 7 OS.
Read our full HTC 7 Trophy review
HTC Wildfire

OS: Android 2.1
A nice phone that's well packaged - it just needs a decent price to go with it and HTC could have solved the problems posed by the HTC Tattoo: a budget Android phone that doesn't scrimp on hardware specs.
Read our full HTC Wildfire review
HTC HD Mini

OS: Windows Mobile 6.5
This is the best Windows Mobile 6.5 handset currently available, and HTC's Sense interface which sits on top of the Windows Mobile interface makes the phone a joy to use.
Read our full HTC HD Mini review
HTC Desire

OS: Android 2.1
As a piece of hardware it's without par in the mobile world. A stunning phone, and one that will show the world that Android isn't just for the hackers and phone geeks any more.
Read our full HTC Desire review
HTC Legend

OS: Android 2.1
If you're someone that doesn't really care massively about apps or gets irritated by a day-long battery life, we couldn't recommend this phone more. The HTC Legend is not quite the phone to persuade the masses Android is finally an adequate iPhone replacement - but it's awfully, awfully close.
Read our full HTC Legend review
HTC HD2

OS: Windows Mobile 6.5
We so desperately want to give the HD2 4.5 stars to rank it alongside the likes of the Legend and the iPhone 3GS, but it just falls short. But until then it will have to be content with being one of the best 'business devices' on the market by a country mile.
Read our full HTC HD2 review
| |
| |
| |
Read More ...
Buying Guide: Which is the best HTC phone?
Our constantly updated list of the best HTC phones.So you've decided that HTC is the brand you want to spend the next 24 months of your life with - but that's not the end of the quest.
You have a plethora of devices, price points and operating systems to choose from and it can all get a little bewildering. But which is the best HTC phone for you?
Thankfully TechRadar is on hand to help you out - check out our run down of all the HTC phones around at the moment:
HTC Incredible S
OS: Android 2.2
The HTC Incredible S is rather nice piece of kit, but has a very odd rear - the innards are vacuum packed to the case, giving the impression of a much thinner phone than it actually is.
The OS is still only Android 2.2, and we'd have hoped for a spot of Gingerbread on a cutting edge handset like this - but a decent camera, slick UI and bright 4-inch screen make this a worthy contender for you HTC dollar.
Read our full HTC Incredible S review
HTC Gratia
OS: Android 2.2
The HTC Gratia is a curious device; if you're after an everyday smartphone at a reasonable price, this could more than ably scratch that itch. In fact, we'd recommend it over many other phones in this bracket. It's very similar to the HTC Wildfire in terms of spec, although does have a smarter chassis design.
If, however, you'd prefer a powerhouse packed with cutting-edge features, there's no doubt that this is too much of a compromise to satisfy. Camera cognoscenti also need not apply.
Read our full HTC Gratia review
HTC 7 Pro
OS: Windows Phone 7
Bringing a portrait QWERTY keyboard to proceedings, the HTC 7 Pro offers the simple Windows Phone 7 interface combined with physical buttons. However, the key design is a little poor, and the chassis is quite chunky too - although if you're hankering for a slide out keyboard and a Microsoft Mobile OS, this wouldn't be the worst option for you.
Read our full HTC 7 Pro review
HTC Desire HD
OS: Android 2.2
The super-sized HTC Desire HD is HTC's attempt to take smartphones to the next level and the HD features a flawless interface and fantastic web browser. Battery life isn't great, though, and it's a little on the large side.
Read our full HTC Desire HD review
HTC Desire Z
OS: Android
An Android phone with a full QWERTY keyboard - so if a physical keyboard is a must on an Android phone, then this is the handset for you.
Read our full HTC Desire Z review
HTC HD7
OS: Windows Phone 7
With a 4.3-inch screen, this phone is huge, and while we're fans of its size some may instantly dismiss it as too big.
Read our full HTC HD7 review
HTC 7 Mozart
OS: Windows Phone 7
The HTC Mozart features a 1GHz processor, 3.7-inch WVGA screen, an eight-megapixel camera with Xenon flash and 720p HD video recording as well as all 3G and Wi-Fi connectivity.
Read our full HTC 7 Mozart review
HTC 7 Trophy
OS: Windows Phone 7
The Trophy looks to be the cheapest of the HTC phones running WP7. آ£25 a month is ridiculously cheap for a phone that offers a 5MP camera, HD video recording, a dedicated GPU and the new Windows Phone 7 OS.
Read our full HTC 7 Trophy review
HTC Wildfire
OS: Android 2.1
A nice phone that's well packaged - it just needs a decent price to go with it and HTC could have solved the problems posed by the HTC Tattoo: a budget Android phone that doesn't scrimp on hardware specs.
Read our full HTC Wildfire review
HTC HD Mini
OS: Windows Mobile 6.5
This is the best Windows Mobile 6.5 handset currently available, and HTC's Sense interface which sits on top of the Windows Mobile interface makes the phone a joy to use.
Read our full HTC HD Mini review
HTC Desire
OS: Android 2.1
As a piece of hardware it's without par in the mobile world. A stunning phone, and one that will show the world that Android isn't just for the hackers and phone geeks any more.
Read our full HTC Desire review
HTC Legend
OS: Android 2.1
If you're someone that doesn't really care massively about apps or gets irritated by a day-long battery life, we couldn't recommend this phone more. The HTC Legend is not quite the phone to persuade the masses Android is finally an adequate iPhone replacement - but it's awfully, awfully close.
Read our full HTC Legend review
HTC HD2
OS: Windows Mobile 6.5
We so desperately want to give the HD2 4.5 stars to rank it alongside the likes of the Legend and the iPhone 3GS, but it just falls short. But until then it will have to be content with being one of the best 'business devices' on the market by a country mile.
Read our full HTC HD2 review
| |
| |
Read More ...
Buying Guide: Which is the best HTC phone?
Our constantly updated list of the best HTC phones.So you've decided that HTC is the brand you want to spend the next 24 months of your life with - but that's not the end of the quest.
You have a plethora of devices, price points and operating systems to choose from and it can all get a little bewildering. But which is the best HTC phone for you?
Thankfully TechRadar is on hand to help you out - check out our run down of all the HTC phones around at the moment:
HTC Incredible S
OS: Android 2.2
The HTC Incredible S is rather nice piece of kit, but has a very odd rear - the innards are vacuum packed to the case, giving the impression of a much thinner phone than it actually is.
The OS is still only Android 2.2, and we'd have hoped for a spot of Gingerbread on a cutting edge handset like this - but a decent camera, slick UI and bright 4-inch screen make this a worthy contender for you HTC dollar.
Read our full HTC Incredible S review
HTC Gratia
OS: Android 2.2
The HTC Gratia is a curious device; if you're after an everyday smartphone at a reasonable price, this could more than ably scratch that itch. In fact, we'd recommend it over many other phones in this bracket. It's very similar to the HTC Wildfire in terms of spec, although does have a smarter chassis design.
If, however, you'd prefer a powerhouse packed with cutting-edge features, there's no doubt that this is too much of a compromise to satisfy. Camera cognoscenti also need not apply.
Read our full HTC Gratia review
HTC 7 Pro
OS: Windows Phone 7
Bringing a portrait QWERTY keyboard to proceedings, the HTC 7 Pro offers the simple Windows Phone 7 interface combined with physical buttons. However, the key design is a little poor, and the chassis is quite chunky too - although if you're hankering for a slide out keyboard and a Microsoft Mobile OS, this wouldn't be the worst option for you.
Read our full HTC 7 Pro review
HTC Desire HD
OS: Android 2.2
The super-sized HTC Desire HD is HTC's attempt to take smartphones to the next level and the HD features a flawless interface and fantastic web browser. Battery life isn't great, though, and it's a little on the large side.
Read our full HTC Desire HD review
HTC Desire Z
OS: Android
An Android phone with a full QWERTY keyboard - so if a physical keyboard is a must on an Android phone, then this is the handset for you.
Read our full HTC Desire Z review
HTC HD7
OS: Windows Phone 7
With a 4.3-inch screen, this phone is huge, and while we're fans of its size some may instantly dismiss it as too big.
Read our full HTC HD7 review
HTC 7 Mozart
OS: Windows Phone 7
The HTC Mozart features a 1GHz processor, 3.7-inch WVGA screen, an eight-megapixel camera with Xenon flash and 720p HD video recording as well as all 3G and Wi-Fi connectivity.
Read our full HTC 7 Mozart review
HTC 7 Trophy
OS: Windows Phone 7
The Trophy looks to be the cheapest of the HTC phones running WP7. آ£25 a month is ridiculously cheap for a phone that offers a 5MP camera, HD video recording, a dedicated GPU and the new Windows Phone 7 OS.
Read our full HTC 7 Trophy review
HTC Wildfire
OS: Android 2.1
A nice phone that's well packaged - it just needs a decent price to go with it and HTC could have solved the problems posed by the HTC Tattoo: a budget Android phone that doesn't scrimp on hardware specs.
Read our full HTC Wildfire review
HTC HD Mini
OS: Windows Mobile 6.5
This is the best Windows Mobile 6.5 handset currently available, and HTC's Sense interface which sits on top of the Windows Mobile interface makes the phone a joy to use.
Read our full HTC HD Mini review
HTC Desire
OS: Android 2.1
As a piece of hardware it's without par in the mobile world. A stunning phone, and one that will show the world that Android isn't just for the hackers and phone geeks any more.
Read our full HTC Desire review
HTC Legend
OS: Android 2.1
If you're someone that doesn't really care massively about apps or gets irritated by a day-long battery life, we couldn't recommend this phone more. The HTC Legend is not quite the phone to persuade the masses Android is finally an adequate iPhone replacement - but it's awfully, awfully close.
Read our full HTC Legend review
HTC HD2
OS: Windows Mobile 6.5
We so desperately want to give the HD2 4.5 stars to rank it alongside the likes of the Legend and the iPhone 3GS, but it just falls short. But until then it will have to be content with being one of the best 'business devices' on the market by a country mile.
Read our full HTC HD2 review
| |
Read More ...
Review: iPad 2
 Our iPad 2 review is a work in progress. Here are our initial findings...
Just under one year ago, Apple shocked the computing world with a 9.7-inch touchscreen tablet that few truly expected.
Some called the original Apple iPad a large-format iPhone. Others berated the name and made jokes that were not remotely funny.
The early reviews were marginal at best – we handed the device a solid four stars. Technical folks decried the lack of Adobe Flash and the missing cameras.
Now, 60,000 apps later (according to Apple, who counts every conceivable option) and just a few weeks after the first real Android 3.0 tablet contender hit the streets (Motorola Xoom), the iPad 2 has sauntered onto the playing field.

Some expected pure gold: a tablet that runs as fast as a laptop and weighs less than a newspaper.
Yet, the reality with the iPad 2 is that Apple has taken an iterative approach. In many ways, the iPad 2 is a crowd pleaser because it does not rock the boat.
At 241mm tall, 186mm wide, and 8.6mm thick, the iPad 2 is just a hair smaller than the original iPad and it's thinner than the iPhone 4. It has a curved edge that makes it look a bit more 'space age' and, surprisingly, easier to grasp because you can curve your fingers more easily around the bezel.

The most dramatic change is the weight. At 680 grams, the iPad 2 is 80g lighter than the first iPad. That is about the same weight as a juicy red apple (curious, eh?). Yet, in using the device, it feels strangely lighter than it really is.
Overall, the new design is the major perk. It's fantastic.

Apple has made a second-gen iPad that feels lighter and more nimble, and its newfound mobility means it has lost the annoying heft of the original model.
Meanwhile, the Motorola Xoom, at 730 grams, now feels like the tank that it is. (More about that later, because we do prefer the speedy processor on the Xoom that handles 3D maps and games.)

One other observation about the design: compared to the iPhone 4, the iPad 2 feels a bit more like a plastic plate (the back is actually metal) as though it really needs a protective case. Part of the reason for this 'cheap plastic' impression is that the device is one-third thinner than the original and 15% lighter.
Overall, the design is a stunner – it's brilliant. The aesthetics are much improved, although not everything about the iPad 2 is so equally impressive.

One thing that has not changed about the iPad 2 is the price: the آ£439 entry-price for the 16GB Wi-Fi model is the same as the original iPad. And, the pricing goes up آ£100 or so for each successive model that doubles the internal storage.
Features
On paper, the iPad 2 is 'twice as fast' as the original iPad, running the brand-new dual core A5 CPU built by ARM.
In practice, it might not be that obvious that the processor is faster. Many apps, such as the Safari browser and the iPod media app, start about as fast as the original iPad. But as we'll see, apps like iMovie and GarageBand do run much faster.

Also on paper, the iPad 2 has more memory for apps. The original model had 256MB of RAM, but the new version doubles that to 512MB. The Motorola Xoom has 1GB of RAM, and that provides an extra boost for running more apps and switching between them, and a noticeable speed improvement for 3D mapping.
We tested the 64GB version W-Fi-only iPad 2 (our iPad 2 3G review is on the way!). With the Xoom, there is only one model with Wi-Fi and 3G. The iPad 2's 64GB of storage is twice that of the Motorola Xoom, although Motorola plans to update the device to support the built-in microSD slot.
Curiously, the iPad 2 screen is the same size and resolution as the original model, running at just 1024 x 768 pixels.

The Motorola Xoom, at 1280 x 800 pixels, is notably superior -- especially for viewing videos, flicking through high-def photos, and using the Android 3.0 interface itself. That's one of the early findings with the iPad 2, that the screen itself is almost indiscernible from that on the iPad.
That said, the iPad 2 's screen still has a better viewing angle than the Xoom or Samsung Galaxy Tab 7-inch.

Most of the power on the iPad 2 comes from the A5 processor, and our early tests show that this dual-core chip does provide some new-found speed, especially in apps like iMovie (on the original iPad, iMovie tends to stutter a bit).
Interestingly, the iPad 2 starts up much faster than the Motorola Xoom. In fact, we started the iPad and browsed to a few Web sites before the Xoom even got to its home screen.

In another test, we loaded up the iPod media player on both the iPad and the iPad 2 with the same music and movie files. Here, we saw another noticeable speed difference – the iPad 2 finishes loading about a second faster. Those speed gains meant clicking on Arcade Fire's latest album to play music just a hair faster.
Several other specs, which we'll cover in our final iPad 2 review, are also new or improved: the two cameras, one for photos and one for video chats; the faster graphics engine, which will made games more bearable; the HDMI-out capability at HD resolution that also lets you mirror whatever you see on the screen. Apple now offers a 30-pin to HDMI cable that could make movie night easier.

Even with the faster processor and better graphics engine, the iPad 2 still lasts about ten hours – or roughly the same as the Motorola Xoom.
Apple has also added a new gyroscope similar to the one on the iPhone 4. This chip, in conjunction with the existing accelerometer, will help make the iPad 2 more sensitive to motion, especially in games but also when you change the orientation.
Read more soon...
We've given the iPad 2 a preliminary score of 4 out of 5. We'll revisit that when we finish the review in the next few days. But in the meantime, our reasoning for the prelim score is this:
The lighter design, A5 processor, cameras, gyroscope, and other enhancements increase the value over the original iPad -- at the same price. But the original iPad is now آ£100 cheaper and Apple has had a year to innovate further. But despite that, in actual real-world speed tests, the most common apps don't perform any faster... yet.
Check back on Monday for the rest of our iPad 2 review!
Related Links
| |
| |
| |
Read More ...
Review: iPad 2
Our Apple iPad 2 review is a work in progress. Here are our initial findings...Just under one year ago, Apple shocked the computing world with a 9.7-inch touchscreen tablet that few truly expected.
Some called the original Apple iPad a large-format iPhone. Others berated the name and made jokes that were not remotely funny.
The early reviews were marginal at best – we handed the device a solid four stars. Technical folks decried the lack of Adobe Flash and the missing cameras.
Now, 60,000 apps later (according to Apple, who counts every conceivable option) and just a few weeks after the first real Android 3.0 tablet contender hit the streets (Motorola Xoom), the iPad 2 has sauntered onto the playing field.
Some expected pure gold: a tablet that runs as fast as a laptop and weighs less than a newspaper.
Yet, the reality with the iPad 2 is that Apple has taken an iterative approach. In many ways, the iPad 2 is a crowd pleaser because it does not rock the boat.
At 241mm tall, 186mm wide, and 8.6mm thick, the iPad 2 is just a hair smaller than the original iPad and it's thinner than the iPhone 4. It has a curved edge that makes it look a bit more 'space age' and, surprisingly, easier to grasp because you can curve your fingers more easily around the bezel.
The most dramatic change is the weight. At 680 grams, the iPad 2 is 80g lighter than the first iPad. That is about the same weight as a juicy red apple (curious, eh?). Yet, in using the device, it feels strangely lighter than it really is.
Overall, the new design is the major perk. It's fantastic.
Apple has made a second-gen iPad that feels lighter and more nimble, and its newfound mobility means it has lost the annoying heft of the original model.
Meanwhile, the Motorola Xoom, at 730 grams, now feels like the tank that it is. (More about that later, because we do prefer the speedy processor on the Xoom that handles 3D maps and games.)
One other observation about the design: compared to the iPhone 4, the iPad 2 feels a bit more like a plastic plate (the back is actually metal) as though it really needs a protective case. Part of the reason for this 'cheap plastic' impression is that the device is one-third thinner than the original and 15% lighter.
Overall, the design is a stunner – it's brilliant. The aesthetics are much improved, although not everything about the iPad 2 is so equally impressive.
One thing that has not changed about the iPad 2 is the price: the آ£439 entry-price for the 16GB Wi-Fi model is the same as the original iPad. And, the pricing goes up آ£100 or so for each successive model that doubles the internal storage.
Features
On paper, the iPad 2 is 'twice as fast' as the original iPad, running the brand-new dual core A5 CPU built by ARM.
In practice, it might not be that obvious that the processor is faster. Many apps, such as the Safari browser and the iPod media app, start about as fast as the original iPad. But as we'll see, apps like iMovie and GarageBand do run much faster.
Also on paper, the iPad 2 has more memory for apps. The original model had 256MB of RAM, but the new version doubles that to 512MB. The Motorola Xoom has 1GB of RAM, and that provides an extra boost for running more apps and switching between them, and a noticeable speed improvement for 3D mapping.
We tested the 64GB version W-Fi-only iPad 2 (our iPad 2 3G review is on the way!). With the Xoom, there is only one model with Wi-Fi and 3G. The iPad 2's 64GB of storage is twice that of the Motorola Xoom, although Motorola plans to update the device to support the built-in microSD slot.
Curiously, the iPad 2 screen is the same size and resolution as the original model, running at just 1024 x 768 pixels.
The Motorola Xoom, at 1280 x 800 pixels, is notably superior -- especially for viewing videos, flicking through high-def photos, and using the Android 3.0 interface itself. That's one of the early findings with the iPad 2, that the screen itself is almost indiscernible from that on the iPad.
That said, the iPad 2 's screen still has a better viewing angle than the Xoom or Samsung Galaxy Tab 7-inch.
Most of the power on the iPad 2 comes from the A5 processor, and our early tests show that this dual-core chip does provide some new-found speed, especially in apps like iMovie (on the original iPad, iMovie tends to stutter a bit).
Interestingly, the iPad 2 starts up much faster than the Motorola Xoom. In fact, we started the iPad and browsed to a few Web sites before the Xoom even got to its home screen.
In another test, we loaded up the iPod media player on both the iPad and the iPad 2 with the same music and movie files. Here, we saw another noticeable speed difference – the iPad 2 finishes loading about a second faster. Those speed gains meant clicking on Arcade Fire's latest album to play music just a hair faster.
Several other specs, which we'll cover in our final iPad 2 review, are also new or improved: the two cameras, one for photos and one for video chats; the faster graphics engine, which will made games more bearable; the HDMI-out capability at HD resolution that also lets you mirror whatever you see on the screen. Apple now offers a 30-pin to HDMI cable that could make movie night easier.
Even with the faster processor and better graphics engine, the iPad 2 still lasts about ten hours – or roughly the same as the Motorola Xoom.
Apple has also added a new gyroscope similar to the one on the iPhone 4. This chip, in conjunction with the existing accelerometer, will help make the iPad 2 more sensitive to motion, especially in games but also when you change the orientation.
Read more soon...
We've given the iPad 2 a preliminary score of 4 out of 5. We'll revisit that when we finish the review in the next few days. But in the meantime, our reasoning for the prelim score is this:
The lighter design, A5 processor, cameras, gyroscope, and other enhancements increase the value over the original iPad -- at the same price. But the original iPad is now آ£100 cheaper and Apple has had a year to innovate further. But despite that, in actual real-world speed tests, the most common apps don't perform any faster... yet.
Check back on Monday for the rest of our Apple iPad 2 review!
Related Links
| |
| |
Read More ...
Review: iPad 2
Our Apple iPad 2 review is a work in progress. Here are our initial findings...Just under one year ago, Apple shocked the computing world with a 9.7-inch touchscreen tablet that few truly expected.
Some called the original Apple iPad a large-format iPhone. Others berated the name and made jokes that were not remotely funny.
The early reviews were marginal at best – we handed the device a solid four stars. Technical folks decried the lack of Adobe Flash and the missing cameras.
Now, 60,000 apps later (according to Apple, who counts every conceivable option) and just a few weeks after the first real Android 3.0 tablet contender hit the streets (Motorola Xoom), the iPad 2 has sauntered onto the playing field.
Some expected pure gold: a tablet that runs as fast as a laptop and weighs less than a newspaper.
Yet, the reality with the iPad 2 is that Apple has taken an iterative approach. In many ways, the iPad 2 is a crowd pleaser because it does not rock the boat.
At 241mm tall, 186mm wide, and 8.6mm thick, the iPad 2 is just a hair smaller than the original iPad and it's thinner than the iPhone 4. It has a curved edge that makes it look a bit more 'space age' and, surprisingly, easier to grasp because you can curve your fingers more easily around the bezel.
The most dramatic change is the weight. At 680 grams, the iPad 2 is 80g lighter than the first iPad. That is about the same weight as a juicy red apple (curious, eh?). Yet, in using the device, it feels strangely lighter than it really is.
Overall, the new design is the major perk. It's fantastic.
Apple has made a second-gen iPad that feels lighter and more nimble, and its newfound mobility means it has lost the annoying heft of the original model.
Meanwhile, the Motorola Xoom, at 730 grams, now feels like the tank that it is. (More about that later, because we do prefer the speedy processor on the Xoom that handles 3D maps and games.)
One other observation about the design: compared to the iPhone 4, the iPad 2 feels a bit more like a plastic plate (the back is actually metal) as though it really needs a protective case. Part of the reason for this 'cheap plastic' impression is that the device is one-third thinner than the original and 15% lighter.
Overall, the design is a stunner – it's brilliant. The aesthetics are much improved, although not everything about the iPad 2 is so equally impressive.
One thing that has not changed about the iPad 2 is the price: the آ£439 entry-price for the 16GB Wi-Fi model is the same as the original iPad. And, the pricing goes up آ£100 or so for each successive model that doubles the internal storage.
Features
On paper, the iPad 2 is 'twice as fast' as the original iPad, running the brand-new dual core A5 CPU built by ARM.
In practice, it might not be that obvious that the processor is faster. Many apps, such as the Safari browser and the iPod media app, start about as fast as the original iPad. But as we'll see, apps like iMovie and GarageBand do run much faster.
Also on paper, the iPad 2 has more memory for apps. The original model had 256MB of RAM, but the new version doubles that to 512MB. The Motorola Xoom has 1GB of RAM, and that provides an extra boost for running more apps and switching between them, and a noticeable speed improvement for 3D mapping.
We tested the 64GB version W-Fi-only iPad 2 (our iPad 2 3G review is on the way!). With the Xoom, there is only one model with Wi-Fi and 3G. The iPad 2's 64GB of storage is twice that of the Motorola Xoom, although Motorola plans to update the device to support the built-in microSD slot.
Curiously, the iPad 2 screen is the same size and resolution as the original model, running at just 1024 x 768 pixels.
The Motorola Xoom, at 1280 x 800 pixels, is notably superior -- especially for viewing videos, flicking through high-def photos, and using the Android 3.0 interface itself. That's one of the early findings with the iPad 2, that the screen itself is almost indiscernible from that on the iPad.
That said, the iPad 2 's screen still has a better viewing angle than the Xoom or Samsung Galaxy Tab 7-inch.
Most of the power on the iPad 2 comes from the A5 processor, and our early tests show that this dual-core chip does provide some new-found speed, especially in apps like iMovie (on the original iPad, iMovie tends to stutter a bit).
Interestingly, the iPad 2 starts up much faster than the Motorola Xoom. In fact, we started the iPad and browsed to a few Web sites before the Xoom even got to its home screen.
In another test, we loaded up the iPod media player on both the iPad and the iPad 2 with the same music and movie files. Here, we saw another noticeable speed difference – the iPad 2 finishes loading about a second faster. Those speed gains meant clicking on Arcade Fire's latest album to play music just a hair faster.
Several other specs, which we'll cover in our final iPad 2 review, are also new or improved: the two cameras, one for photos and one for video chats; the faster graphics engine, which will made games more bearable; the HDMI-out capability at HD resolution that also lets you mirror whatever you see on the screen. Apple now offers a 30-pin to HDMI cable that could make movie night easier.
Even with the faster processor and better graphics engine, the iPad 2 still lasts about ten hours – or roughly the same as the Motorola Xoom.
Apple has also added a new gyroscope similar to the one on the iPhone 4. This chip, in conjunction with the existing accelerometer, will help make the iPad 2 more sensitive to motion, especially in games but also when you change the orientation.
Read more soon...
We've given the iPad 2 a preliminary score of 4 out of 5. We'll revisit that when we finish the review in the next few days. But in the meantime, our reasoning for the prelim score is this:
The lighter design, A5 processor, cameras, gyroscope, and other enhancements increase the value over the original iPad -- at the same price. But the original iPad is now آ£100 cheaper and Apple has had a year to innovate further. But despite that, in actual real-world speed tests, the most common apps don't perform any faster... yet.
Check back on Monday for the rest of our Apple iPad 2 review!
Related Links
| |
Read More ...
Tutorial: 15 handy Windows XP tips and tricks
 We've all got a loyal old PC knocking around in a dark corner at home - one that's a bit of an old dog: arthritic and rather ponderous, but unwaveringly dependable if you can't use your main PC for any reason.
 That old machine will almost certainly be running Windows XP. Who not give it a bit of TLC and make it useful again? Here are our Windows XP tips to breathe new life into that machine.
1. Remove the Recycle Bin
If you prefer to work with a completely clear desktop, you can hide the Recycle Bin with a little Registry hack. You can still use the [Shift] + [Delete] shortcut to access the Bin when you need it.
Choose 'Start | Run' and type Regedit in the 'Open' bar. Click 'OK'. Now browse to the following location:
'HKEY_ LOCAL_MACHINE\SOFTWARE\Microsoft\Windows\Current Version\Explorer\HideDesktop Icons\NewStartPanel\'
Create a new DWORD value and give it the following name:
'{645FF040-5081-101B-9F08-00AA002F954E}'
Double-click this and change its value to '1'. Quit Registry Editor, then right-click an empty space somewhere on your desktop and choose 'Refresh'. The Recycle Bin icon will magically disappear from the desktop. You can get it back again at any time by changing the value back to '0'.
2. Create your own toolbar

You can turn a folder into a toolbar for quick and easy access to its contents. Right-click the taskbar and choose 'Toolbars | New toolbar' from the menu. This launches the 'New toolbar' dialog.
Select the item that you want to use as a toolbar. If necessary, browse through 'My Documents' or 'My Computer' to find the folder you want. Alternatively, click 'Make new folder' to create a custom one. Click 'OK'. Your new toolbar will appear as a button on the taskbar.
Click this to see an expanding menu of its contents. Subfolders become their own expanding menus. Select a file to open it in its associated application.
3. Use Group Policy Editor
Windows XP Professional Edition includes the Group Policy Editor, which is a very powerful tool that enables you to configure what permissions and access each account has. This isn't available in the Home Edition.
To launch it, Choose 'Start | Run' and enter gpedit. msc in the 'Open' bar. Click 'OK'. Expand 'User Configuration' in the left-hand pane. You'll see subfolders for 'Software settings', 'Windows settings' and 'Administrative templates'.
By expanding these, you can find a range of options to configure. Expand 'Administrative templates', followed by 'Control panel'. Here you can alter what appears in the user's control panel.
One particularly useful setting is the one that prohibits access so you can stop other users changing your settings. Double-click 'Prohibit access to the control panel' in the right-hand pane. This opens a dialog. Select 'Enabled' and click 'OK'. Choose the 'Explain' tab to find out more about this setting.
Each setting listed here has three options for configuration. 'Not configured' means you'll make no change to the current setup. 'Enabled' turns the setting on, and 'Disabled' turns it off again. It's worth exploring the various configurations you can make, but make sure you're fully backed up before you do so.
4. Cut the Start menu delay
There's a slight delay built into the Start menu to give you thinking time. If you know your way around, you can shorten it with a Registry edit.
Open the Registry Editor by choosing 'Start | Run' and entering Regedit in the 'Open' bar, then clicking 'OK'.
Now go to 'HKEY_CURRENT_USER\Control Panel\Desktop'. Double-click the 'MenuShowDelay' value and change it from the default 400 to a lower number of your choice.
5. Disable autorun for discs
Put a disc in your CD/DVD drive and you'll notice an appreciable lag as it spins up, even if you're not just about to use it. If you don't always need your CDs and DVDs to launch automatically when you insert them, the needless spinning up of the discs can slow your machine down.
You can disable CD autorun by modifying this registry key:
'HKEY_LOCAL_ MACHINE\SYSTEM\Current ControlSet\Services\Cdrom'. Double-click the 'AutoRun Dword' value and set it to '0'. Change it to '1' to restore it.
6. Disable menu animation
You can turn off animated menus in Windows XP for faster navigation. In Regedit, open the key 'HKEY_CURRENT_USER\Control Panel\Desktop' and create the string value 'MinAnimate'. Give it a '0' value. To restore menu animations, delete this string value.
7. Reduce hanging time

By default, Windows waits for five seconds to allow time for any hung applications to be closed properly as you shut down your computer. You can change this hanging time with a registry edit.
Browse to 'HKEY_CURRENT_USER\Control Panel\Desktop' and select the string entry called 'HungApp Timeout'. If you're using Vista, you'll need to create this entry. Right-click this and choose 'Modify'.
The number is in milliseconds, so the default of 5,000 is a wait of five seconds. Simply choose a lower number to shorten the wait time.
8. Remove text from icons
You can improve the general look of your PC's desktop by removing the names of shortcuts, leaving the icons to speak for themselves. If you try renaming a desktop shortcut to a single space, Windows XP won't let you.
However, you can force it to accept a space as the name by holding down [Alt] and typing 255 on the number pad. If you want multiple shortcuts to have blank names, you'll need to give each one a different number of spaces to avoid them having identical names.
9. Create a mute shortcut
You can make a custom shortcut that mutes and unmutes your PC's sound by downloading a small utility called Nircmd, which you can get from www.nirsoft.net/utils/nircmd.html.
Download and extract the file contents to 'My Documents'. Next, right-click the desktop and choose 'New | Shortcut'. Enter the following for the shortcut location:
"C:\Documents and Settings\Owner\My Documents\nircmd\nircmd.exe" mutesysvolume 2.
Ensure that the path points to the location where you extracted the 'Nircmd.exe' file. Name the shortcut 'mute_ unmute'. Double-click it to mute your speakers and do so again to turn them back on.
10. Remove programs from the 'Open With' list
Stop programs appearing on the 'Open with' list when you're trying to open an unrecognised file.
Open Regedit and browse to HKEY_ CLASSES_ROOT\Applications', and you'll see a list of programs that are installed on your PC as subkeys in the left-hand pane. To remove an unwanted program from this list, select it and right-click in the right hand pane.
Choose 'New | String value'. Name it 'NoOpenWith'. Repeat for each application that you want to remove from this list.
11. Correct file sorting
By default, a file named '2.jpg' will be sorted after one called '20.jpg'. Many people work around this by starting single-digit numbers in file names with a leading zero, but you can change this behaviour by making a Registry edit.
Browse to the Registry key HKEY_CURRENT_USER\Software\Microsoft\Windows\CurrentVersion\Explore.
Create a new DWORD value and name it 'NoStrCmpLogical'. Right click and modify its value to '1'.
12. Add new 'Copy to' key

Add a 'Copy to folder' option to the right-click context menu so that you can quickly copy a file by right-clicking it.
In the Registry Editor, browse to 'HKEY_CLASSES_ROOT\AllFilesystemObjects\shellex\ContextMenuHandlers' and create a new key called 'Copy to'. Change its default value to '{C2FBB630-2971-11d1-A18C-00C04FD75D13}' and check it works in Windows.
You can also add a 'Move to folder' option in this way. From the same 'ContextMenuHandlers' key, simply create a new key called 'Move to' and then change its default value to '{C2FBB631-2971-11d1-A18C-00C04FD75D13}' to do this.
13. Skip welcome screen

You can choose to log into Windows automatically and bypass the welcome screen by making a simple tweak. To do this, choose 'Start | Run' and enter control userpasswords2 into the 'Open' bar. Click 'OK' to see a dialog showing each user installed on the PC.
Clear the box marked 'Users must enter a user name and password to use this computer'. Click 'OK'. Now restart your PC and you should go directly to your desktop.
14. Display shortcut keys
When you open a menu or My Computer window in XP, you can see what shortcut keys are available by pressing [Alt] once - underlined letters will appear, and pressing that letter will trigger the appropriate shortcut, whether it's ticking a box or selecting a button.
You can make these underlined letters appear automatically from the 'Appearance' tab under the 'Desktop' control panel. Click the 'Effects' button and remove the tick next to the box marked 'Hide underlined letters for keyboard navigation until I press the Alt key'. Click 'OK' twice.
15. Say 'No to all' requests
When you're copying or moving a group of files, you'll sometimes be prompted to provide a 'Yes' or a 'Yes to all' response - if you need to give permission for a process to to overwrite existing files, for example.
Choose the latter option and similar files that prompt the same question will be ignored in future. But what if you want 'No to all' instead? There's no visible option, but you can select 'No to all' by simply holding the [Shift] key as you click 'No'.
| |
| |
| |
| |
Read More ...
Tutorial: 15 handy Windows XP tips and tricks
We've all got a loyal old PC knocking around in a dark corner at home - one that's a bit of an old dog: arthritic and rather ponderous, but unwaveringly dependable if you can't use your main PC for any reason. That old machine will almost certainly be running Windows XP. Who not give it a bit of TLC and make it useful again? Here are our Windows XP tips to breathe new life into that machine.
1. Remove the Recycle Bin
If you prefer to work with a completely clear desktop, you can hide the Recycle Bin with a little Registry hack. You can still use the [Shift] + [Delete] shortcut to access the Bin when you need it.
Choose 'Start | Run' and type Regedit in the 'Open' bar. Click 'OK'. Now browse to the following location:
'HKEY_ LOCAL_MACHINE\SOFTWARE\Microsoft\Windows\Current Version\Explorer\HideDesktop Icons\NewStartPanel\'
Create a new DWORD value and give it the following name:
'{645FF040-5081-101B-9F08-00AA002F954E}'
Double-click this and change its value to '1'. Quit Registry Editor, then right-click an empty space somewhere on your desktop and choose 'Refresh'. The Recycle Bin icon will magically disappear from the desktop. You can get it back again at any time by changing the value back to '0'.
2. Create your own toolbar
You can turn a folder into a toolbar for quick and easy access to its contents. Right-click the taskbar and choose 'Toolbars | New toolbar' from the menu. This launches the 'New toolbar' dialog.
Select the item that you want to use as a toolbar. If necessary, browse through 'My Documents' or 'My Computer' to find the folder you want. Alternatively, click 'Make new folder' to create a custom one. Click 'OK'. Your new toolbar will appear as a button on the taskbar.
Click this to see an expanding menu of its contents. Subfolders become their own expanding menus. Select a file to open it in its associated application.
3. Use Group Policy Editor
Windows XP Professional Edition includes the Group Policy Editor, which is a very powerful tool that enables you to configure what permissions and access each account has. This isn't available in the Home Edition.
To launch it, Choose 'Start | Run' and enter gpedit. msc in the 'Open' bar. Click 'OK'. Expand 'User Configuration' in the left-hand pane. You'll see subfolders for 'Software settings', 'Windows settings' and 'Administrative templates'.
By expanding these, you can find a range of options to configure. Expand 'Administrative templates', followed by 'Control panel'. Here you can alter what appears in the user's control panel.
One particularly useful setting is the one that prohibits access so you can stop other users changing your settings. Double-click 'Prohibit access to the control panel' in the right-hand pane. This opens a dialog. Select 'Enabled' and click 'OK'. Choose the 'Explain' tab to find out more about this setting.
Each setting listed here has three options for configuration. 'Not configured' means you'll make no change to the current setup. 'Enabled' turns the setting on, and 'Disabled' turns it off again. It's worth exploring the various configurations you can make, but make sure you're fully backed up before you do so.
4. Cut the Start menu delay
There's a slight delay built into the Start menu to give you thinking time. If you know your way around, you can shorten it with a Registry edit.
Open the Registry Editor by choosing 'Start | Run' and entering Regedit in the 'Open' bar, then clicking 'OK'.
Now go to 'HKEY_CURRENT_USER\Control Panel\Desktop'. Double-click the 'MenuShowDelay' value and change it from the default 400 to a lower number of your choice.
5. Disable autorun for discs
Put a disc in your CD/DVD drive and you'll notice an appreciable lag as it spins up, even if you're not just about to use it. If you don't always need your CDs and DVDs to launch automatically when you insert them, the needless spinning up of the discs can slow your machine down.
You can disable CD autorun by modifying this registry key:
'HKEY_LOCAL_ MACHINE\SYSTEM\Current ControlSet\Services\Cdrom'. Double-click the 'AutoRun Dword' value and set it to '0'. Change it to '1' to restore it.
6. Disable menu animation
You can turn off animated menus in Windows XP for faster navigation. In Regedit, open the key 'HKEY_CURRENT_USER\Control Panel\Desktop' and create the string value 'MinAnimate'. Give it a '0' value. To restore menu animations, delete this string value.
7. Reduce hanging time
By default, Windows waits for five seconds to allow time for any hung applications to be closed properly as you shut down your computer. You can change this hanging time with a registry edit.
Browse to 'HKEY_CURRENT_USER\Control Panel\Desktop' and select the string entry called 'HungApp Timeout'. If you're using Vista, you'll need to create this entry. Right-click this and choose 'Modify'.
The number is in milliseconds, so the default of 5,000 is a wait of five seconds. Simply choose a lower number to shorten the wait time.
8. Remove text from icons
You can improve the general look of your PC's desktop by removing the names of shortcuts, leaving the icons to speak for themselves. If you try renaming a desktop shortcut to a single space, Windows XP won't let you.
However, you can force it to accept a space as the name by holding down [Alt] and typing 255 on the number pad. If you want multiple shortcuts to have blank names, you'll need to give each one a different number of spaces to avoid them having identical names.
9. Create a mute shortcut
You can make a custom shortcut that mutes and unmutes your PC's sound by downloading a small utility called Nircmd, which you can get from www.nirsoft.net/utils/nircmd.html.
Download and extract the file contents to 'My Documents'. Next, right-click the desktop and choose 'New | Shortcut'. Enter the following for the shortcut location:
"C:\Documents and Settings\Owner\My Documents\nircmd\nircmd.exe" mutesysvolume 2.
Ensure that the path points to the location where you extracted the 'Nircmd.exe' file. Name the shortcut 'mute_ unmute'. Double-click it to mute your speakers and do so again to turn them back on.
10. Remove programs from the 'Open With' list
Stop programs appearing on the 'Open with' list when you're trying to open an unrecognised file.
Open Regedit and browse to HKEY_ CLASSES_ROOT\Applications', and you'll see a list of programs that are installed on your PC as subkeys in the left-hand pane. To remove an unwanted program from this list, select it and right-click in the right hand pane.
Choose 'New | String value'. Name it 'NoOpenWith'. Repeat for each application that you want to remove from this list.
11. Correct file sorting
By default, a file named '2.jpg' will be sorted after one called '20.jpg'. Many people work around this by starting single-digit numbers in file names with a leading zero, but you can change this behaviour by making a Registry edit.
Browse to the Registry key HKEY_CURRENT_USER\Software\Microsoft\Windows\CurrentVersion\Explore.
Create a new DWORD value and name it 'NoStrCmpLogical'. Right click and modify its value to '1'.
12. Add new 'Copy to' key
Add a 'Copy to folder' option to the right-click context menu so that you can quickly copy a file by right-clicking it.
In the Registry Editor, browse to 'HKEY_CLASSES_ROOT\AllFilesystemObjects\shellex\ContextMenuHandlers' and create a new key called 'Copy to'. Change its default value to '{C2FBB630-2971-11d1-A18C-00C04FD75D13}' and check it works in Windows.
You can also add a 'Move to folder' option in this way. From the same 'ContextMenuHandlers' key, simply create a new key called 'Move to' and then change its default value to '{C2FBB631-2971-11d1-A18C-00C04FD75D13}' to do this.
13. Skip welcome screen
You can choose to log into Windows automatically and bypass the welcome screen by making a simple tweak. To do this, choose 'Start | Run' and enter control userpasswords2 into the 'Open' bar. Click 'OK' to see a dialog showing each user installed on the PC.
Clear the box marked 'Users must enter a user name and password to use this computer'. Click 'OK'. Now restart your PC and you should go directly to your desktop.
14. Display shortcut keys
When you open a menu or My Computer window in XP, you can see what shortcut keys are available by pressing [Alt] once - underlined letters will appear, and pressing that letter will trigger the appropriate shortcut, whether it's ticking a box or selecting a button.
You can make these underlined letters appear automatically from the 'Appearance' tab under the 'Desktop' control panel. Click the 'Effects' button and remove the tick next to the box marked 'Hide underlined letters for keyboard navigation until I press the Alt key'. Click 'OK' twice.
15. Say 'No to all' requests
When you're copying or moving a group of files, you'll sometimes be prompted to provide a 'Yes' or a 'Yes to all' response - if you need to give permission for a process to to overwrite existing files, for example.
Choose the latter option and similar files that prompt the same question will be ignored in future. But what if you want 'No to all' instead? There's no visible option, but you can select 'No to all' by simply holding the [Shift] key as you click 'No'.
| |
| |
| |
Read More ...
Tutorial: 15 handy Windows XP tips and tricks
We've all got a loyal old PC knocking around in a dark corner at home - one that's a bit of an old dog: arthritic and rather ponderous, but unwaveringly dependable if you can't use your main PC for any reason. That old machine will almost certainly be running Windows XP. Who not give it a bit of TLC and make it useful again? Here are our Windows XP tips to breathe new life into that machine.
1. Remove the Recycle Bin
If you prefer to work with a completely clear desktop, you can hide the Recycle Bin with a little Registry hack. You can still use the [Shift] + [Delete] shortcut to access the Bin when you need it.
Choose 'Start | Run' and type Regedit in the 'Open' bar. Click 'OK'. Now browse to the following location:
'HKEY_ LOCAL_MACHINE\SOFTWARE\Microsoft\Windows\Current Version\Explorer\HideDesktop Icons\NewStartPanel\'
Create a new DWORD value and give it the following name:
'{645FF040-5081-101B-9F08-00AA002F954E}'
Double-click this and change its value to '1'. Quit Registry Editor, then right-click an empty space somewhere on your desktop and choose 'Refresh'. The Recycle Bin icon will magically disappear from the desktop. You can get it back again at any time by changing the value back to '0'.
2. Create your own toolbar
You can turn a folder into a toolbar for quick and easy access to its contents. Right-click the taskbar and choose 'Toolbars | New toolbar' from the menu. This launches the 'New toolbar' dialog.
Select the item that you want to use as a toolbar. If necessary, browse through 'My Documents' or 'My Computer' to find the folder you want. Alternatively, click 'Make new folder' to create a custom one. Click 'OK'. Your new toolbar will appear as a button on the taskbar.
Click this to see an expanding menu of its contents. Subfolders become their own expanding menus. Select a file to open it in its associated application.
3. Use Group Policy Editor
Windows XP Professional Edition includes the Group Policy Editor, which is a very powerful tool that enables you to configure what permissions and access each account has. This isn't available in the Home Edition.
To launch it, Choose 'Start | Run' and enter gpedit. msc in the 'Open' bar. Click 'OK'. Expand 'User Configuration' in the left-hand pane. You'll see subfolders for 'Software settings', 'Windows settings' and 'Administrative templates'.
By expanding these, you can find a range of options to configure. Expand 'Administrative templates', followed by 'Control panel'. Here you can alter what appears in the user's control panel.
One particularly useful setting is the one that prohibits access so you can stop other users changing your settings. Double-click 'Prohibit access to the control panel' in the right-hand pane. This opens a dialog. Select 'Enabled' and click 'OK'. Choose the 'Explain' tab to find out more about this setting.
Each setting listed here has three options for configuration. 'Not configured' means you'll make no change to the current setup. 'Enabled' turns the setting on, and 'Disabled' turns it off again. It's worth exploring the various configurations you can make, but make sure you're fully backed up before you do so.
4. Cut the Start menu delay
There's a slight delay built into the Start menu to give you thinking time. If you know your way around, you can shorten it with a Registry edit.
Open the Registry Editor by choosing 'Start | Run' and entering Regedit in the 'Open' bar, then clicking 'OK'.
Now go to 'HKEY_CURRENT_USER\Control Panel\Desktop'. Double-click the 'MenuShowDelay' value and change it from the default 400 to a lower number of your choice.
5. Disable autorun for discs
Put a disc in your CD/DVD drive and you'll notice an appreciable lag as it spins up, even if you're not just about to use it. If you don't always need your CDs and DVDs to launch automatically when you insert them, the needless spinning up of the discs can slow your machine down.
You can disable CD autorun by modifying this registry key:
'HKEY_LOCAL_ MACHINE\SYSTEM\Current ControlSet\Services\Cdrom'. Double-click the 'AutoRun Dword' value and set it to '0'. Change it to '1' to restore it.
6. Disable menu animation
You can turn off animated menus in Windows XP for faster navigation. In Regedit, open the key 'HKEY_CURRENT_USER\Control Panel\Desktop' and create the string value 'MinAnimate'. Give it a '0' value. To restore menu animations, delete this string value.
7. Reduce hanging time
By default, Windows waits for five seconds to allow time for any hung applications to be closed properly as you shut down your computer. You can change this hanging time with a registry edit.
Browse to 'HKEY_CURRENT_USER\Control Panel\Desktop' and select the string entry called 'HungApp Timeout'. If you're using Vista, you'll need to create this entry. Right-click this and choose 'Modify'.
The number is in milliseconds, so the default of 5,000 is a wait of five seconds. Simply choose a lower number to shorten the wait time.
8. Remove text from icons
You can improve the general look of your PC's desktop by removing the names of shortcuts, leaving the icons to speak for themselves. If you try renaming a desktop shortcut to a single space, Windows XP won't let you.
However, you can force it to accept a space as the name by holding down [Alt] and typing 255 on the number pad. If you want multiple shortcuts to have blank names, you'll need to give each one a different number of spaces to avoid them having identical names.
9. Create a mute shortcut
You can make a custom shortcut that mutes and unmutes your PC's sound by downloading a small utility called Nircmd, which you can get from www.nirsoft.net/utils/nircmd.html.
Download and extract the file contents to 'My Documents'. Next, right-click the desktop and choose 'New | Shortcut'. Enter the following for the shortcut location:
"C:\Documents and Settings\Owner\My Documents\nircmd\nircmd.exe" mutesysvolume 2.
Ensure that the path points to the location where you extracted the 'Nircmd.exe' file. Name the shortcut 'mute_ unmute'. Double-click it to mute your speakers and do so again to turn them back on.
10. Remove programs from the 'Open With' list
Stop programs appearing on the 'Open with' list when you're trying to open an unrecognised file.
Open Regedit and browse to HKEY_ CLASSES_ROOT\Applications', and you'll see a list of programs that are installed on your PC as subkeys in the left-hand pane. To remove an unwanted program from this list, select it and right-click in the right hand pane.
Choose 'New | String value'. Name it 'NoOpenWith'. Repeat for each application that you want to remove from this list.
11. Correct file sorting
By default, a file named '2.jpg' will be sorted after one called '20.jpg'. Many people work around this by starting single-digit numbers in file names with a leading zero, but you can change this behaviour by making a Registry edit.
Browse to the Registry key HKEY_CURRENT_USER\Software\Microsoft\Windows\CurrentVersion\Explore.
Create a new DWORD value and name it 'NoStrCmpLogical'. Right click and modify its value to '1'.
12. Add new 'Copy to' key
Add a 'Copy to folder' option to the right-click context menu so that you can quickly copy a file by right-clicking it.
In the Registry Editor, browse to 'HKEY_CLASSES_ROOT\AllFilesystemObjects\shellex\ContextMenuHandlers' and create a new key called 'Copy to'. Change its default value to '{C2FBB630-2971-11d1-A18C-00C04FD75D13}' and check it works in Windows.
You can also add a 'Move to folder' option in this way. From the same 'ContextMenuHandlers' key, simply create a new key called 'Move to' and then change its default value to '{C2FBB631-2971-11d1-A18C-00C04FD75D13}' to do this.
13. Skip welcome screen
You can choose to log into Windows automatically and bypass the welcome screen by making a simple tweak. To do this, choose 'Start | Run' and enter control userpasswords2 into the 'Open' bar. Click 'OK' to see a dialog showing each user installed on the PC.
Clear the box marked 'Users must enter a user name and password to use this computer'. Click 'OK'. Now restart your PC and you should go directly to your desktop.
14. Display shortcut keys
When you open a menu or My Computer window in XP, you can see what shortcut keys are available by pressing [Alt] once - underlined letters will appear, and pressing that letter will trigger the appropriate shortcut, whether it's ticking a box or selecting a button.
You can make these underlined letters appear automatically from the 'Appearance' tab under the 'Desktop' control panel. Click the 'Effects' button and remove the tick next to the box marked 'Hide underlined letters for keyboard navigation until I press the Alt key'. Click 'OK' twice.
15. Say 'No to all' requests
When you're copying or moving a group of files, you'll sometimes be prompted to provide a 'Yes' or a 'Yes to all' response - if you need to give permission for a process to to overwrite existing files, for example.
Choose the latter option and similar files that prompt the same question will be ignored in future. But what if you want 'No to all' instead? There's no visible option, but you can select 'No to all' by simply holding the [Shift] key as you click 'No'.
| |
| |
Read More ...
Tutorial: 15 handy Windows XP tips and tricks
We've all got a loyal old PC knocking around in a dark corner at home - one that's a bit of an old dog: arthritic and rather ponderous, but unwaveringly dependable if you can't use your main PC for any reason. That old machine will almost certainly be running Windows XP. Who not give it a bit of TLC and make it useful again? Here are our Windows XP tips to breathe new life into that machine.
1. Remove the Recycle Bin
If you prefer to work with a completely clear desktop, you can hide the Recycle Bin with a little Registry hack. You can still use the [Shift] + [Delete] shortcut to access the Bin when you need it.
Choose 'Start | Run' and type Regedit in the 'Open' bar. Click 'OK'. Now browse to the following location:
'HKEY_ LOCAL_MACHINE\SOFTWARE\Microsoft\Windows\Current Version\Explorer\HideDesktop Icons\NewStartPanel\'
Create a new DWORD value and give it the following name:
'{645FF040-5081-101B-9F08-00AA002F954E}'
Double-click this and change its value to '1'. Quit Registry Editor, then right-click an empty space somewhere on your desktop and choose 'Refresh'. The Recycle Bin icon will magically disappear from the desktop. You can get it back again at any time by changing the value back to '0'.
2. Create your own toolbar
You can turn a folder into a toolbar for quick and easy access to its contents. Right-click the taskbar and choose 'Toolbars | New toolbar' from the menu. This launches the 'New toolbar' dialog.
Select the item that you want to use as a toolbar. If necessary, browse through 'My Documents' or 'My Computer' to find the folder you want. Alternatively, click 'Make new folder' to create a custom one. Click 'OK'. Your new toolbar will appear as a button on the taskbar.
Click this to see an expanding menu of its contents. Subfolders become their own expanding menus. Select a file to open it in its associated application.
3. Use Group Policy Editor
Windows XP Professional Edition includes the Group Policy Editor, which is a very powerful tool that enables you to configure what permissions and access each account has. This isn't available in the Home Edition.
To launch it, Choose 'Start | Run' and enter gpedit. msc in the 'Open' bar. Click 'OK'. Expand 'User Configuration' in the left-hand pane. You'll see subfolders for 'Software settings', 'Windows settings' and 'Administrative templates'.
By expanding these, you can find a range of options to configure. Expand 'Administrative templates', followed by 'Control panel'. Here you can alter what appears in the user's control panel.
One particularly useful setting is the one that prohibits access so you can stop other users changing your settings. Double-click 'Prohibit access to the control panel' in the right-hand pane. This opens a dialog. Select 'Enabled' and click 'OK'. Choose the 'Explain' tab to find out more about this setting.
Each setting listed here has three options for configuration. 'Not configured' means you'll make no change to the current setup. 'Enabled' turns the setting on, and 'Disabled' turns it off again. It's worth exploring the various configurations you can make, but make sure you're fully backed up before you do so.
4. Cut the Start menu delay
There's a slight delay built into the Start menu to give you thinking time. If you know your way around, you can shorten it with a Registry edit.
Open the Registry Editor by choosing 'Start | Run' and entering Regedit in the 'Open' bar, then clicking 'OK'.
Now go to 'HKEY_CURRENT_USER\Control Panel\Desktop'. Double-click the 'MenuShowDelay' value and change it from the default 400 to a lower number of your choice.
5. Disable autorun for discs
Put a disc in your CD/DVD drive and you'll notice an appreciable lag as it spins up, even if you're not just about to use it. If you don't always need your CDs and DVDs to launch automatically when you insert them, the needless spinning up of the discs can slow your machine down.
You can disable CD autorun by modifying this registry key:
'HKEY_LOCAL_ MACHINE\SYSTEM\Current ControlSet\Services\Cdrom'. Double-click the 'AutoRun Dword' value and set it to '0'. Change it to '1' to restore it.
6. Disable menu animation
You can turn off animated menus in Windows XP for faster navigation. In Regedit, open the key 'HKEY_CURRENT_USER\Control Panel\Desktop' and create the string value 'MinAnimate'. Give it a '0' value. To restore menu animations, delete this string value.
7. Reduce hanging time
By default, Windows waits for five seconds to allow time for any hung applications to be closed properly as you shut down your computer. You can change this hanging time with a registry edit.
Browse to 'HKEY_CURRENT_USER\Control Panel\Desktop' and select the string entry called 'HungApp Timeout'. If you're using Vista, you'll need to create this entry. Right-click this and choose 'Modify'.
The number is in milliseconds, so the default of 5,000 is a wait of five seconds. Simply choose a lower number to shorten the wait time.
8. Remove text from icons
You can improve the general look of your PC's desktop by removing the names of shortcuts, leaving the icons to speak for themselves. If you try renaming a desktop shortcut to a single space, Windows XP won't let you.
However, you can force it to accept a space as the name by holding down [Alt] and typing 255 on the number pad. If you want multiple shortcuts to have blank names, you'll need to give each one a different number of spaces to avoid them having identical names.
9. Create a mute shortcut
You can make a custom shortcut that mutes and unmutes your PC's sound by downloading a small utility called Nircmd, which you can get from www.nirsoft.net/utils/nircmd.html.
Download and extract the file contents to 'My Documents'. Next, right-click the desktop and choose 'New | Shortcut'. Enter the following for the shortcut location:
"C:\Documents and Settings\Owner\My Documents\nircmd\nircmd.exe" mutesysvolume 2.
Ensure that the path points to the location where you extracted the 'Nircmd.exe' file. Name the shortcut 'mute_ unmute'. Double-click it to mute your speakers and do so again to turn them back on.
10. Remove programs from the 'Open With' list
Stop programs appearing on the 'Open with' list when you're trying to open an unrecognised file.
Open Regedit and browse to HKEY_ CLASSES_ROOT\Applications', and you'll see a list of programs that are installed on your PC as subkeys in the left-hand pane. To remove an unwanted program from this list, select it and right-click in the right hand pane.
Choose 'New | String value'. Name it 'NoOpenWith'. Repeat for each application that you want to remove from this list.
11. Correct file sorting
By default, a file named '2.jpg' will be sorted after one called '20.jpg'. Many people work around this by starting single-digit numbers in file names with a leading zero, but you can change this behaviour by making a Registry edit.
Browse to the Registry key HKEY_CURRENT_USER\Software\Microsoft\Windows\CurrentVersion\Explore.
Create a new DWORD value and name it 'NoStrCmpLogical'. Right click and modify its value to '1'.
12. Add new 'Copy to' key
Add a 'Copy to folder' option to the right-click context menu so that you can quickly copy a file by right-clicking it.
In the Registry Editor, browse to 'HKEY_CLASSES_ROOT\AllFilesystemObjects\shellex\ContextMenuHandlers' and create a new key called 'Copy to'. Change its default value to '{C2FBB630-2971-11d1-A18C-00C04FD75D13}' and check it works in Windows.
You can also add a 'Move to folder' option in this way. From the same 'ContextMenuHandlers' key, simply create a new key called 'Move to' and then change its default value to '{C2FBB631-2971-11d1-A18C-00C04FD75D13}' to do this.
13. Skip welcome screen
You can choose to log into Windows automatically and bypass the welcome screen by making a simple tweak. To do this, choose 'Start | Run' and enter control userpasswords2 into the 'Open' bar. Click 'OK' to see a dialog showing each user installed on the PC.
Clear the box marked 'Users must enter a user name and password to use this computer'. Click 'OK'. Now restart your PC and you should go directly to your desktop.
14. Display shortcut keys
When you open a menu or My Computer window in XP, you can see what shortcut keys are available by pressing [Alt] once - underlined letters will appear, and pressing that letter will trigger the appropriate shortcut, whether it's ticking a box or selecting a button.
You can make these underlined letters appear automatically from the 'Appearance' tab under the 'Desktop' control panel. Click the 'Effects' button and remove the tick next to the box marked 'Hide underlined letters for keyboard navigation until I press the Alt key'. Click 'OK' twice.
15. Say 'No to all' requests
When you're copying or moving a group of files, you'll sometimes be prompted to provide a 'Yes' or a 'Yes to all' response - if you need to give permission for a process to to overwrite existing files, for example.
Choose the latter option and similar files that prompt the same question will be ignored in future. But what if you want 'No to all' instead? There's no visible option, but you can select 'No to all' by simply holding the [Shift] key as you click 'No'.
| |
Read More ...
In Depth: Beyond the touchscreen: interfaces of the future
 We're living in interesting times. Tech firms want to take over our TVs, our phones are more powerful than some recent PCs, and we can control games consoles through the medium of dance.
 New interfaces are all around us, from touch screens to augmented reality, and the way we interact with technology is being transformed. But which interfaces are genuine leaps forward and which are digital dead ends? What makes a good user interface anyway?
Videos of very young children playing with iPads have become an internet clichأ©, but they demonstrate how intuitive technology is becoming: nobody was filming two-year-olds using IBM's original PC.
The IBM PC's command line interface was streets ahead of 1970s computers' switches, of course, but it wasn't until the arrival of the graphical user interfaces of the 1980s and beyond that personal computing became simple enough for the mainstream. And now the landscape is changing again.
After more than two decades of dominance, WIMP interfaces - windows, icons, menus and pointing devices - face new challengers in the form of multi-touch devices, voice control, gesture input and augmented reality.
This year's Consumer Electronics Show in Las Vegas showed where we're heading. Microsoft demonstrated its Kinect sensor doing a great job of voice recognition - no mean feat in a crowded venue - and gesture control, with users controlling video apps with waves of their hands, while everyone else seemed to be showing off some form of touch-controlled tablet.
Gestures certainly seem more futuristic than Google's vision of a QWERTY keyboard in every remote control, but are these ideas a mere fad? Is multi-touch a credible form of PC input?
"It's credible," says Gord Kurtenbach, Autodesk's Director of Research. "We're just at the start of determining how multi-touch can be used in the context of desktop PC systems. Obviously adding multi-touch to the display monitor makes a cool demo, but when using it over a period of time your arms get tired… Some of the most promising work I've seen uses multi-touch in concert with standard desktop configurations of mouse, keyboard and monitor. After all, the keyboard is a multi-touch device and that has been pretty successful, so I can imagine multi-touch tablets and displays being used horizontally as controller devices."
Everything's an interface
Multi-touch certainly won't be the only way we interact with our gadgets. As James McCarthy, senior windows consumer product manager with Microsoft, points out, the era of natural user interfaces (NUIs) has already begun: Windows' Photo Gallery uses image processing to recognise faces, eight million Xbox 360 owners control their console using Kinect and some two million motorists are talking to Ford Sync-equipped vehicles.

Forget the ropey speech recognition systems of the 1990s: voice control is back, and this time it works. That's partly because modern systems now specialise. Hardware is now much more powerful, and cloud computing allows remote processing and real-time results.
"The way we interact with technology is becoming more natural, allowing our devices to work on our behalf instead of just at our command," McCarthy says. "You can already envision the world we're imagining through Microsoft research projects like a prototype of an automated receptionist; Microsoft LightSpace, a technology prototype showing the potential of using depth-sensing cameras to naturally interact with any surface; and Project Gustav, a realistic painting prototype that lets artists become immersed in the digital painting experience, just as Kinect helps people become the controller in the gaming experience."
The magic touch
Touch control has been around for a long time. What's different about today's touch technology is that touch has become multi-touch: instead of prodding with a stylus we're pinching and pulling with one, two or ten fingers. That means tablets can be typewriters, pianos, canvases, or anything else we fancy playing with.
Done well, multi-touch removes abstraction - instead of moving a device like a mouse to point at something, you just point at it; instead of clicking on piano keys or trying to remember which keyboard key corresponds to each note, you just play the note.

Multi-touch is a good illustration of Fitts's Law, which was proposed by Paul Fitts in 1954. The law states that the time needed to move to a target area is a function of the distance to and the size of the target. In effect, that means big icons are easier to hit than little ones, top-of-screen menus are easier to click on than top-of-window ones and pop-up menus are faster than pull-downs.
There's more to effective UIs than big icons, of course. Good UIs remove complexity and obstacles, so for example, a mouse-and-windows OS is more intuitive than a command line interface and a multi-touch OS can be more intuitive than a mouse-based one.
Designers can do several things to streamline interfaces. They can use metaphors to make things more obvious - for example, we all know what desktops are, what control panels do and what recycle bins are for - and they can use icons and nested menus to reduce visual clutter. They can use context-sensitive menus and hinting, where the interface offers visual clues such as tooltips, and they can add indicators to icons.
However, if you keep adding features to the underlying system, eventually you'll run out of tweaks. As Microsoft program manager Jensen Harris recalls, by Office 2003 the UI was beginning to feel bloated, "like a suitcase stuffed to the gills with vacation clothes".
No wonder - it was essentially the same UI that Office had in 1989. As Harris explains, "There's a point beyond which menus and toolbars cease to scale well. A flat menu with eight well-organised commands on it works just great; a three-level hierarchical menu containing 35 loosely-related commands can be a bit of a disaster."
Microsoft redesigned the Office UI and the result was the Ribbon, which makes Office less intimidating and features easier to find. It annoyed power users though, demonstrating that when it comes to UIs, you can't please everybody.
An extra dimension
Three dimensional games, TVs and monitors are being hyped this year. How about 3D software?
Microsoft and Nvidia have teamed up for what they call the 3D PC, but that's about consuming games and movies. A 3D OS would be far trickier to put together. Just ask Autodesk, which has been in the 3D business for decades.
"Many people believe that because in the real world we navigate 3D physical spaces with ease, 3D navigation should make navigation of 3D virtual spaces easy as well," Kurtenbach says.
"However, everything changes when the space is behind the display monitor. It becomes hard, like learning to fly an aeroplane using controls. So the old idea that your desktop will be easier to use if it's a 3D virtual space that you can navigate around hasn't really made things easier. Certainly, we've made big advances in 3D navigation with such product features as SteeringWheels, but these interfaces are for navigating spaces that truly need to be in 3D, such as CAD models."
That doesn't mean it isn't possible. Toshiba recently showed an auto-stereoscopic display that uses a six-axis accelerometer, effectively letting users look around 3D objects, and Autodesk has the wonderfully named Boom Chameleon.
"The Boom Chameleon is a very different approach to 3D navigation where the tablet PC acts like window into a virtual space," Kurtenbach says. "When you move the tablet, you change your window into the virtual space. With current tablet systems that have position sensors or built-in cameras, this type of thing can already be accomplished and I've seen examples of the Chameleon on tablets and mobile devices built by student researchers. As devices become more powerful, we'll see this becoming more practical and useful."
One vision of the future is to replace the desktop and monitor with multi-touch screens. That's the thinking behind the BendDesk. BendDesk is a multitouch display in two sections: one where you'd normally have a screen and where you'd normally have a keyboard and mouse.

As its creators, members of Aachen University's Media Computing Group, explain: "BendDesk is a multi-touch desk that combines a vertical and a horizontal surface with a curve into one large interactive workspace. This workspace can be used to display digital content like documents, photos or videos. Multi-touch technology allows the user to interact with the entire surface."
BendDesk is a concept, but advances in e-paper technology will make it possible within a few years. One thing it doesn't do is offer physical feedback of the kind we expect from keyboards, mice and other devices. But there may be an answer to that too: haptic feedback.
Haptic feedback is physical feedback: the click of the mouse button, the pressure you feel when your fingers press a key and so on. Apple and Microsoft have both filed patents for haptic systems: the former's idea places small vibrators around a screen, with multiple vibrators creating effects at specific locations on a phone or tablet's surface, while Microsoft intends to make screens that can shape-shift.

Microsoft's application describes a screen made from hundreds of tiny, light-activated tiles: hit them with the right frequency and they change shape to make a D-pad controller, a keyboard or text in Braille.
The move to mobile
Smartphones enable all kinds of new interfaces. Apps can use the camera as an input device, or be controlled by voice. Accelerometers, gyroscopes and GPS mean phones know where they are, what they're pointing at and if they're moving, which makes augmented reality possible.
With augmented reality, the world around you is the interface. When they're done well, as they are in apps such as Nearest Tube, they're intuitive and instantly understood - although our experiences of augmented reality to date suggest it's still in the 'coming soon' category rather than a useful, everyday technology.
Even without augmented reality, apps represent a new frontier in interface design: with an OS that's happy to give the entire screen over to an app, designers have been free to experiment. It's reminiscent of the early days of the web, and interface conventions will emerge.
As technology evolves, networks improve and we cram ever more processing power into ever-smaller form factors, we'll use a mix of different interfaces: voice, augmented reality and maybe even a keyboard, real or virtual.
As Gord Kurtenbach puts it: "We'll continue to add different setups to support different ways and times of working. Back in the '80s, I had to go to the university lab to use a computer. Later, I got one at home and I could do different types of work from both. Today I have desktop at home and work, a couple of laptops, a tablet, a mobile phone and so on. I use all of them, but in different ways for different things in different places."
| |
| |
| |
| |
Read More ...
Review: Lexmark Genesis S815
 This new Lexmark multifunction device (MFD) is full of fresh ideas. A printer, scanner and photocopier with USB or Wi-Fi 'n' connectivity and colour fax support.
The Genesis' optical image capture is based on Lexmark's new Flash Scan technology, replacing the usual reflective scanner with a 10MP digital camera. This makes it incredibly fast, capturing the entire scannable area in just three seconds, with no warm-up time needed.
Genesis abandons the traditional form factor in favour of a much more upright design. The 'scanner' is positioned in a near-vertical orientation, allowing for a smaller, space-saving footprint. A clip at the top of the scannable area and a shelf at its foot stop your documents from sliding down the glass.
Its 4.3-inch capacitive touchscreen does more than control the device's functions too. After connecting the Genesis to your wireless network, you can download and install Lexmark's SmartSolutions mini-apps. These include a basic calculator, clock display, Facebook and Twitter integration, apps to view, scan to and print from MobileMe, Flickr and Picasa, print your own graph or music paper and even display news and sports feeds from Apple, ESPN and the BBC. Over 60 apps are already available, and more are in the works.
But for all its innovation, the Genesis also makes compromises. The camera-based image capture function has a maximum resolution of 300dpi. While this is good enough for most home users, if you need a high-resolution scanner, this isn't the printer for you.
Also, its three-second image capture speed is rendered almost moot by the lack of an automatic document feeder. If you've a handful of pages to scan one after another, you have to open the lid and change them by hand after each scan.
There's only one paper tray too, an open feeder at the back of the device – inconvenient if you like a second tray for letterheads or photo paper.
Thankfully, there's no compromise in print quality. Text output is dark and crisp, remaining readable even at very low point sizes. Our 20-page text document printed in six minutes, five seconds, which is pedestrian but not problematic. A top-quality A4 photo print took two minutes, 32 seconds, which is perfectly acceptable.
Default-setting plain-paper photo prints are natural and complete, and when you switch to photo paper and max out the quality settings, the results are commendable, but maybe not quite as good as a recent Canon.
Lexmark's Genesis S815 is innovative and ideal for most home users. Versatile and user-friendly, it offers great integration with online services, but it's not the best for high-resolution scanning, fast document printing or stellar photo printing.
Related Links
| |
| |
| |
| |
Read More ...
Review: Lexmark Genesis S815
This new Lexmark multifunction device (MFD) is full of fresh ideas. A printer, scanner and photocopier with USB or Wi-Fi 'n' connectivity and colour fax support.The Genesis' optical image capture is based on Lexmark's new Flash Scan technology, replacing the usual reflective scanner with a 10MP digital camera. This makes it incredibly fast, capturing the entire scannable area in just three seconds, with no warm-up time needed.
Genesis abandons the traditional form factor in favour of a much more upright design. The 'scanner' is positioned in a near-vertical orientation, allowing for a smaller, space-saving footprint. A clip at the top of the scannable area and a shelf at its foot stop your documents from sliding down the glass.
Its 4.3-inch capacitive touchscreen does more than control the device's functions too. After connecting the Genesis to your wireless network, you can download and install Lexmark's SmartSolutions mini-apps. These include a basic calculator, clock display, Facebook and Twitter integration, apps to view, scan to and print from MobileMe, Flickr and Picasa, print your own graph or music paper and even display news and sports feeds from Apple, ESPN and the BBC. Over 60 apps are already available, and more are in the works.
But for all its innovation, the Genesis also makes compromises. The camera-based image capture function has a maximum resolution of 300dpi. While this is good enough for most home users, if you need a high-resolution scanner, this isn't the printer for you.
Also, its three-second image capture speed is rendered almost moot by the lack of an automatic document feeder. If you've a handful of pages to scan one after another, you have to open the lid and change them by hand after each scan.
There's only one paper tray too, an open feeder at the back of the device – inconvenient if you like a second tray for letterheads or photo paper.
Thankfully, there's no compromise in print quality. Text output is dark and crisp, remaining readable even at very low point sizes. Our 20-page text document printed in six minutes, five seconds, which is pedestrian but not problematic. A top-quality A4 photo print took two minutes, 32 seconds, which is perfectly acceptable.
Default-setting plain-paper photo prints are natural and complete, and when you switch to photo paper and max out the quality settings, the results are commendable, but maybe not quite as good as a recent Canon.
Lexmark's Genesis S815 is innovative and ideal for most home users. Versatile and user-friendly, it offers great integration with online services, but it's not the best for high-resolution scanning, fast document printing or stellar photo printing.
Related Links
| |
| |
| |
Read More ...
No comments:
Post a Comment